

The Selection Fields Add-In provides an easy way to export your tabular data while retaining your filters. This tool creates a formula field for each selection set. For each record the formula fields contain 1 or 0 to indicate whether that row had been selected. This is particularly useful when you need to export the results of applying categories to point location data such as store type, or when selecting ZIP Codes to indicate territories.
To install:*
To use the Selection Fields Add-In
| To do this... | Do this... |
| Create a new field for each selection set | Choose Create a field for each non-empty set |
| Create a field for a single selection set | Choose Create a field for the set chosen below and choose the selection set from the drop-down list. If features are in multiple selection sets, you can check Create fields for overlapping sets to create fields for every set to which any records in the chosen set also belong. Leave it unchecked to create a single field for just the chosen selection set. |
*NOTE: The Selection Fields add-in works only with Maptitude 2023 or higher.
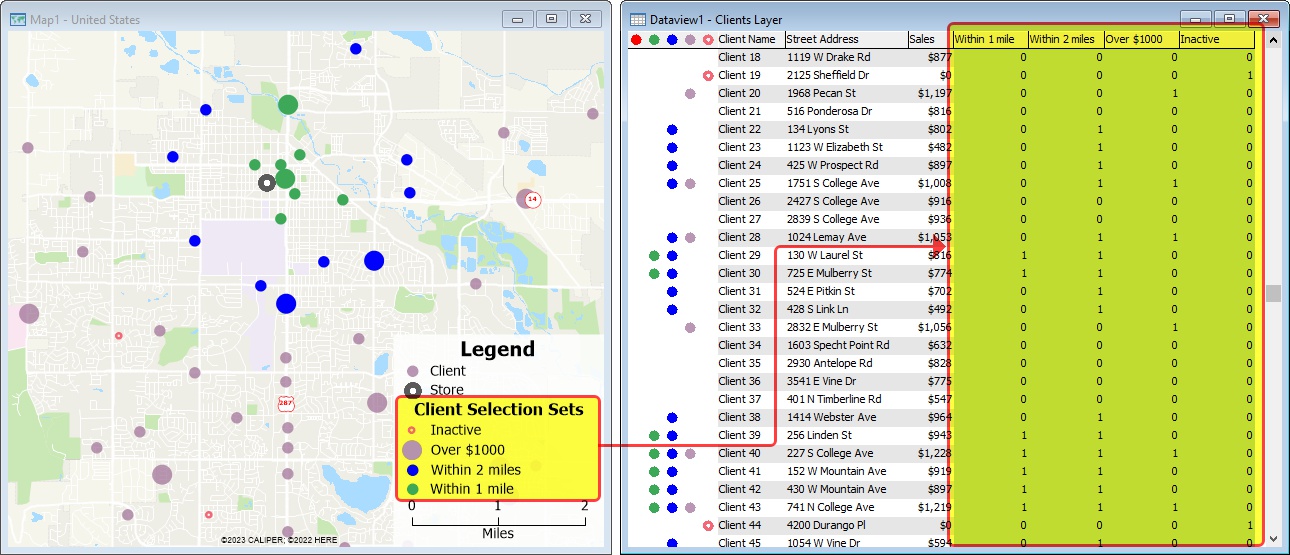
Using the Selection Fields add-in, you could create a table with a field for each of your selection filters. For each selection set, a value of 1 indicates that a record is in the set.