You can assign customers or sales representatives to territories or districts with sales territory mapping software.
When constructing territories in Maptitude, you can export these regions to report on which points are contained within your regions. However, you may have found yourself with working regions that do not contain all of your points, but you need to create assignments nonetheless. This article will explain how to tag all your point locations with their assigned territory even if they are not inside a territory.
To do this, we will add a field to your point layer that specifies the name of the territory the point is in or the closest territory:
- Right-click your point layer in the display manager and choose New Dataview
- Go to Dataview>Table>Modify
- Click the “Add Field” button, give it type “Character” and name it “Nearest Territory”. Click OK to close.
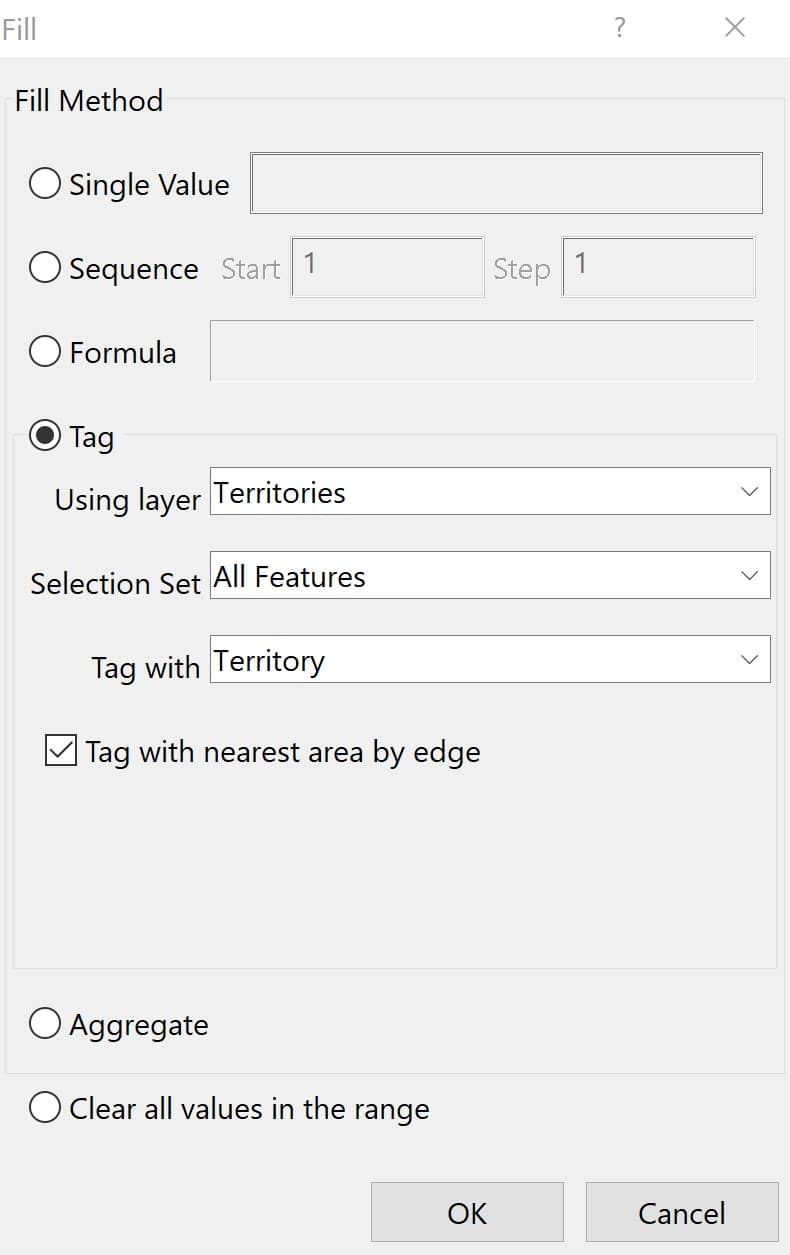
- Right-click “Nearest Territory” in the table and choose “Fill”
- Click the “Tag” radio option and tag with your territory layer. Make sure to tag with the name of the territory.
- Check the “Tag with nearest area by edge” to also tag any points that do not fall within a territory with the name of their closest territory. Click OK.
This will fill your new field with the territory assignment for each point. You can then export this using File>Export>Table.
For more information on mapping addresses in Maptitude, please see the video tutorial on the Create-a-Map Wizard.
For more information on managing your territories, please see the working with territories video tutorial.