Maptitude Help / Managing Geographic Files / Converting Lines and Areas
Converting Lines and Areas
Maptitude lets you convert line features to area features and vice versa. You convert lines and areas using the Tools>Editing>Line/Area Conversion command. You can either convert all the features in a layer, or use the selection tools to select particular features to convert.
For example, you might want to define sales territories by major roads. To do so, you select the roads that make up the boundaries and then convert line features to area features. Maptitude will use the roads to create boundaries and save the sales territories as an area layer in a new geographic file. Note, you cannot convert line layers protected by the HERE license such as streets.
 To Create Area Layers from Line Features
- Open the map that contains the line features you want to convert.
- Choose the layer you want from the layer list on the toolbar.
- If you want certain lines to define area boundaries, use the selection tools to select the lines.
- Choose Tools>Editing>Line/Area Conversion. Maptitude displays the Convert Lines to Areas dialog box.
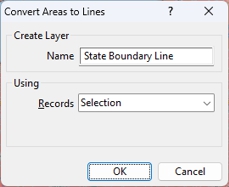
- Type a name for the layer in the Name edit box.
- Choose the features to use from the Records drop-down list.
- Click OK.
Maptitude creates the new area geographic file and adds it to the map.
To Create Line Layers from Area Features
- Open the map that contains the area features you want to convert.
- Choose the layer you want from the layer list on the toolbar.
- If you want to convert certain areas to lines, use the selection tools to select those areas.
- Choose Tools>Editing>Line/Area Conversion. Maptitude displays the Convert Areas to Lines dialog box.
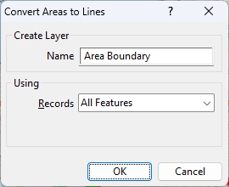
- Type a name for the layer in the Name edit box.
- Choose the features to use from the Records drop-down list.
- Click OK.
Maptitude creates the new line geographic file and adds it to the map.
©2026 Caliper Corporation