Maptitude Help / Managing Geographic Files / Converting Points to Areas
Converting Points to Areas
Maptitude lets you convert clusters of point features into area features. When you convert to area features, Maptitude creates a new geographic file containing the points.
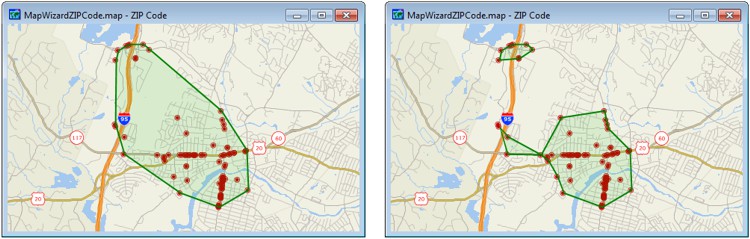
Maptitude creates areas around the points based on a tolerance. A very large tolerance will create a convex hull of all the points (left). A smaller tolerance may create disconnected areas (right). A very small tolerance may connect none of the points, and thus create an empty area database. You have the option of treating disconnected areas as a single area feature or as separate area features.
 To Create Area Layers from Point Features
- Open the map that contains the point features you want to convert, and if necessary, create a selection set of the points if you do not want to use all of the features in the layer.
- Choose the point layer from the drop-down list on the Standard toolbar to make it the working layer.
- Choose Tools>Editing>Point to Area Conversion to display the Point to Area Conversion dialog box.
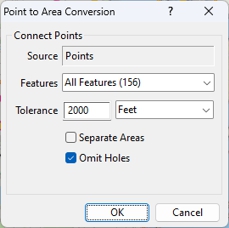
- Choose whether to use all features in the point layer or a selection set from the Features drop-down list.
- Enter a maximum distance tolerance and choose the units.
- Check the Separate Areas box to create separate area features for areas with multiple polygons or leave unchecked to create a single area feature.
- Check the Omit Holes box to create areas that do not have holes for areas that are like a doughnut.
- Click OK.
Maptitude creates the new area geographic file and adds it to your map.
©2026 Caliper Corporation