Maptitude Help / Creating and Using Layouts / Creating Layouts
Creating Layouts
You can create a layout for any printer that you have installed on your computer. When you create a new layout, Maptitude uses your default Windows printer and settings. You can use the File>Properties command to change the printer to use, as well as other layout settings such as the number of pages, the paper size, and orientation.
You place maps, dataviews, and figures using the  Place Map/Dataview in Layout tool on the Standard toolbar. You can also use the drawing tools located in the same drop-down as the Place Map/Dataview in Layout tool to further enhance your layout. Once you have placed items, you can adjust and arrange them any way you want. You can also choose to use rulers and a snap-to grid to help you position items on the page.
The following layout shows some of the possibilities for your final product:
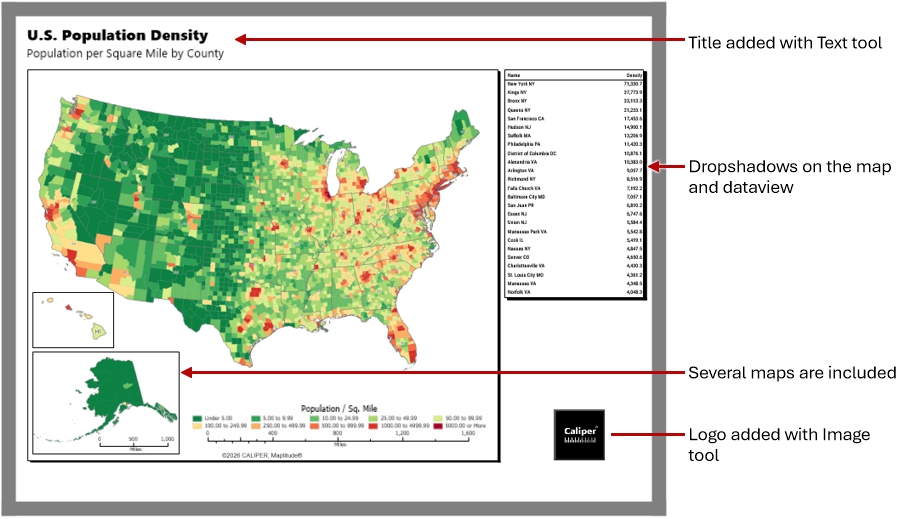
When placing maps, figures, and dataviews into a layout, remember two important points:
- The maps, figures, and dataviews you place in a layout are copies of the original. Once placed, the copy does not change even if you make changes to the original. For example, once you place a map in the layout, changing the visible layers on the original map has no effect on the map in the layout. Similarly, once you place a dataview in a layout, changing the font or columns in the original dataview has no effect on the dataview in the layout.
- The data in a layout are live. If the data change, the map components depicting that data will change. For example, if you update the data that is used for a color theme on a map in your layout, the theme will reflect the updated data if you print the layout. Data in the visible columns of a dataview also will change if the data change.
A layout can be any number of pages wide and high. Maptitude prints across pages to reach the layout size you specified. To assemble your final product, trim the printed pages and tape them together.
Any layouts that you have open in your workspace are saved as part of the workspace. When you close and reopen the workspace, your layouts will be restored.
 |
For a video tutorial see: (Internet connection required) |
 To Create a Layout
Maptitude displays a new window containing the empty layout. You are now ready to place maps, figures, dataviews, and freehand items into the layout.
Changing Layout Settings
You can change the layout settings at any time, even after you have placed items in the layout. If you choose to change the page size, you can also choose whether or not to have items in the layout change size too.
- Right-click anywhere on the layout window except on an item and choose Properties. Maptitude displays the Layout Properties dialog box.
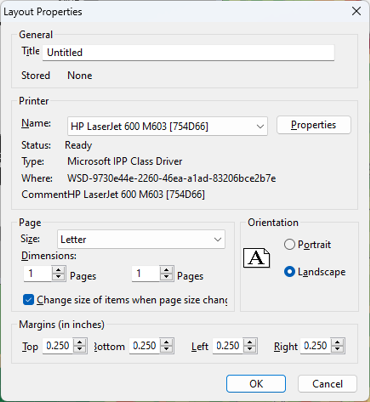
- Choose a printer from the Name drop-down list.
- Choose the paper size and orientation. Optionally, specify dimensions if you want to create a layout that spans several pages.
- If you already have items in the layout and are changing the page size, check the Change size of items when page size changes box if you want the items to automatically resize to the new page or leave it unchecked if you will manually resize items on the resized page.
- Click OK.
Maptitude draws the layout with the new settings.
 |
TIP: You can also get to the Layout Properties dialog box by clicking |
 on the Standard toolbar and then clicking
  in the Properties column of the layout you want to modify.
©2026 Caliper Corporation