Maptitude Help / Creating and Using Layouts / Placing Windows in a Layout
Placing Windows in a Layout
When you place a map or figure in a layout, Maptitude makes sure your labels, symbols, and line styles remain the same size relative to the map or figure window. For example, if a label is about 1/20th the height of your map window, it will be about 1/20th the size of the map in the layout, no matter what size paper you are printing to. If, however, you want labels to be a certain size (say, 12 point) no matter how big or small your map is in the layout, you can tell Maptitude to use the actual point sizes you set up in your map. When you use the actual point sizes, the map in the layout may not exactly match the map window. For example, if you place a map into a large layout for a plotter with the actual point size option, you will likely see many more features labeled because there is now more room for labels than in the map window.
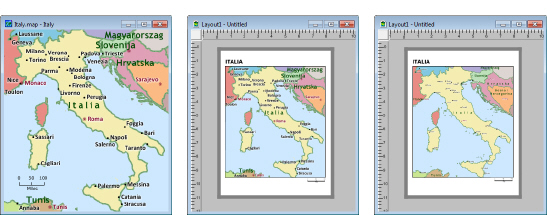
Place the map (left) into a layout with the Use Actual Point Sizes option off and the labels, line widths, and point features will scale so they as appear as in the map (center). Place it into a layout with the Use Actual Point Sizes option on and labels, line widths, and point features will use the size specified in the map (right)
You can lock the scale of a map when you place it in a layout. This means that even if you resize or reshape the map in the layout, Maptitude remembers the scale you set and adjusts the map so that it always displays the geographic data at that fixed scale. The map in the layout may cover a smaller or larger geographic area than the map window.
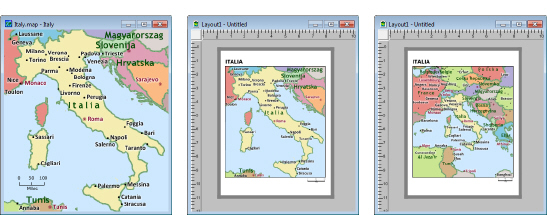
Place the 1:10,000,000 scale map (left) into a layout, it displays the same geographic extent when the Print at Fixed Scale option is off and the scale will likely be larger or smaller depending on the layout page size (center). Place it in a layout with Print at Fixed Scale option on and it will continue to be 1:10,000,000 but the geographic extent may be more or less depending on the layout page size.
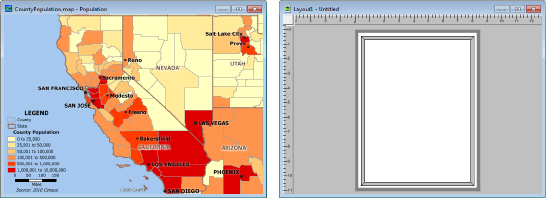
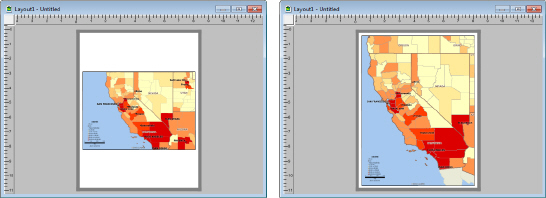
You can also choose to keep the shape of the map window (aspect ratio), or to extend the map to fill the frame. The first choice may change the height or width of the frame, while the second preserves the height and width of the frame.
|
Place this map... |
...in this frame |
|
It will look like this if you keep the map's aspect ratio... |
...and like this if you don't keep the map's aspect ratio |
When you place a dataview in a layout Maptitude displays every column and uses a font that makes it possible to fit all the columns in the space you set for the dataview. If you have many columns, the text in the dataview can be too small to read. For this reason, it’s a good idea to set up your dataview first so that only the most important fields are included.
Once you have placed the dataview, you can change its location, size, and shape with the Pointer tool. Although Maptitude displays every column in your dataview, the number of records (rows) shown is dependent on the height of the dataview. Maptitude displays as many records as possible in the area you sketched out. If you make the dataview longer than is necessary to show all of the data, Maptitude automatically reduces its size.
Once you place an item in a layout, you can move and resize it using the Pointer tool. If you want an object to maintain its relative width and height as you reshape it, hold down the Shift key while you drag an editing handle with the Pointer tool.
Placing Maps, Dataviews, or Figures in a Layout
You can place as many maps, dataviews, and figures as you like in the layout, along with any number of freehand items.
 |
For a video tutorial see: (Internet connection required) |
 To Place a Map, Dataview, or Figure in a Layout
- Create a map, dataview, or figure, and design it so it looks the way you want.
- Make the layout window the active window.
- Click
 on the Standard toolbar to activate the Place tool.
 - Drag a rectangle in the layout to show where you want to place the map, dataview, or figure. Maptitude displays the Add to Layout dialog box.
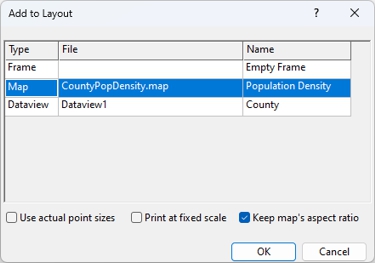
- Choose an item to place in the layout from the grid view.
- Choose options based on the following table:
| To do this... | Do this... |
|---|---|
| Show labels, symbols, & line styles at their actual point sizes | Check the Use Actual Point Sizes box |
| Show labels, symbols, & line styles at the same relative size (WYSIWYG) | Remove the check from the Use Actual Point Sizes box |
| Draw maps at the same scale used in the map window | Check the Print at Fixed Scale box |
| Draw maps at a scale that fits into the frame | Remove the check from the Print at Fixed Scale box |
| Keep the shape of the map window | Check the Keep Map’s Aspect Ratio box |
| Extend the map to fill the dragged rectangle | Remove the check from the Keep Map’s Aspect Ratio box |
- Click OK.
Maptitude draws the map, dataview, or figure in the layout at the location you specified.
Editing a Map, Dataview, or Figure from a Layout
To edit an item in a layout, you open it in a separate map, dataview, or figure window. After you make changes, you place the revised map, dataview, or figure into the layout.
To Edit Maps, Dataviews, and Figures from a Layout
- Click
 on the Standard toolbar to activate the Pointer tool, and double-click on the map, dataview, or figure you want to change, or right-click on the map, dataview, or figure you want to change, and choose Open. Maptitude displays the map, dataview, or figure in a new window.
 - Make any desired changes.
- Make the layout window the active window.
- Right-click on the map, dataview, or figure you want to change, and choose Replace. Maptitude displays the Add to Layout dialog box.
- Choose the revised item to replace.
- Click OK.
Maptitude updates the layout.
Using Frames
Frames are placeholders in a layout. Use frames when you want to create a standard template that you can use over and over again. You place a frame in a layout the same way you place any other window. Later, you can place a map, dataview, or figure into the frame.
To Place a Frame in a Layout
- Click on the Standard toolbar to activate the Place tool.
- Drag a rectangle in the layout to show where you want to place the frame. Maptitude displays the Add to Layout dialog box.
- Choose Empty Frame.
- Click OK.
Maptitude draws an empty frame in the layout.
To Place a Map, Dataview, or Figure in a Frame
- Click on the Standard toolbar to activate the Pointer tool and double-click on the frame, or right-click on the frame and choose Replace. Maptitude displays the Add to Layout dialog box.
- Choose an item to place in the layout from the scroll list.
- Choose options based on the following table:
| To do this... | Do this... |
|---|---|
| Show automatic labels, symbols, & line styles at their actual point sizes | Check the Use Actual Point Sizes box |
| Show automatic labels, symbols, & line styles at the same relative size | Remove the check from the Use Actual Point Sizes box |
| Draw maps at the same scale used in the map window | Check the Print at Fixed Scale box |
| Draw maps at a scale that fits into the frame | Remove the check from the Print at Fixed Scale box |
| Keep the shape of the map window | Check the Keep Map’s Aspect Ratio box |
| Extend the map to fill the dragged rectangle | Remove the check from the Keep Map’s Aspect Ratio box |
- Click OK.
Maptitude updates the layout.
©2026 Caliper Corporation