Maptitude Help / Tutorial / Adding Distance Buffers to the Map
Stage 5: Adding Distance Buffers to the Map
Now let’s create buffers on the map to show how far these customers are from your downtown location. We’ll do this using the Buffers toolbar. The Buffers toolbar lets you point and click on the map to add temporary features, and then build buffers of any distance around the features you added.
 To Add Buffers to the Map
- Choose Tools>Analysis>Buffers Toolbar or click
 Buffers Toolbar in the analysis tools drop-down on the Standard toolbar.
 - Click
 in the Buffers toolbar.
 - Click near the center of the city.
- Click
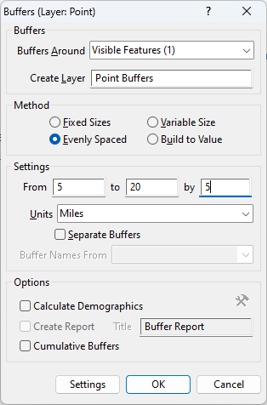
 in the Buffers toolbar and click No when Maptitude asks you if you want to save the point you added to a new layer. Maptitude displays the Buffers dialog box.
 - Choose Evenly Spaced from the Method radio list.
- Type “5” in the From edit box, “20” in the To edit box, and “5” in the By edit box.
- Click OK.
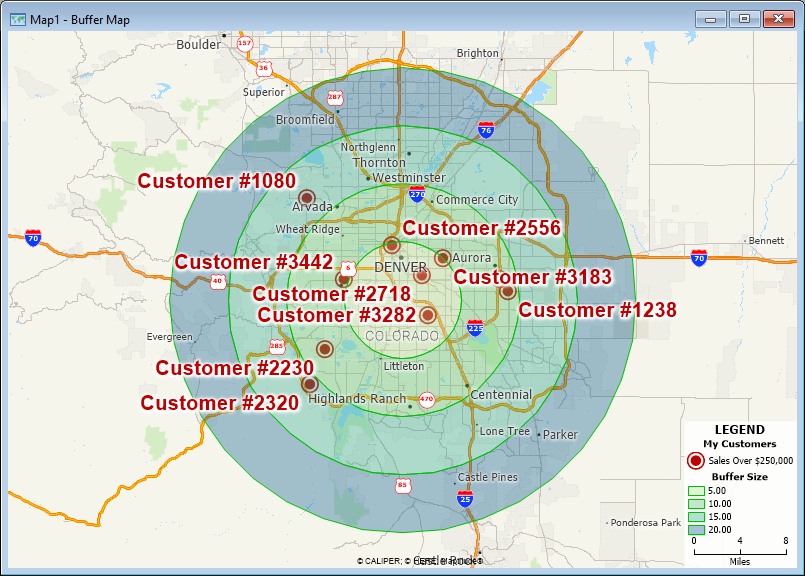
Maptitude creates buffers at 5 mile/kilometer intervals from the location where you clicked and displays them on the map so that you can see the proximity of the best customers to your location. Notice that the Display Manager now has a new layer called "Point Buffers."
To Customize the Legend
- Right-click on the legend and choose Properties.
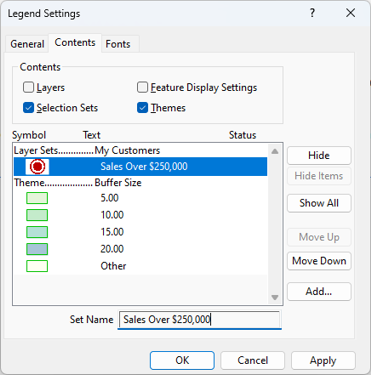
- Click the Contents tab.
- Remove the check from the Layers box.
- Highlight the My Customers Layer selection sets item in the scroll list and replace the text in the Subtitle box with “My Customers” to rename the selection sets section of the legend.
- Highlight the Selection item in the scroll list and replace the text in the Set Name box with “Sales Over $250,000” to rename the selection set in the legend.
- Click OK.
Finally, let's retitle this map.
To Retitle a Map
- Right-click anywhere on the map except on a label and choose Properties.
- Change the title to "Buffer Map" and click OK.
Your map should now look something like this:
Click  to save the changes to the workspace and move on to Stage 6: Displaying Data for Customers of Interest.
©2026 Caliper Corporation