Maptitude Help / Tutorial / Selecting Customers of Interest
Stage 3: Selecting Customers of Interest
Every one of the points that are on the map still has your data attached to it. You can use the Info tool to see the data for each customer on the map.
 To See Information for a Customer
- Click
 Info in the Info drop-down on the Standard toolbar.
 - Click on a customer location on the map.
Maptitude displays all of the data for the customer feature in an Info window. Notice that it has all of the customer data, including address and sales data, that were in the Excel spreadsheet.
- Click on several other customer locations to see the data associated with them, then click the Close button in the top right corner of the Info window to close it.
For your presentation, you want to identify the biggest customers that are also close to your downtown location.
To Select the Customers Near the City Center
- Click
 Select by Circle in the Selection Tools drop-down on the Standard toolbar to activate the Select by Circle tool.
 - Click on the map near the city center to display the Enter Selection Radius dialog box. Type “20” as the radius and leave the units unchanged.
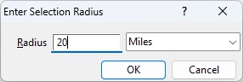
- Click OK.
Maptitude selects all of the customers within 20 miles/kilometers of where you clicked and highlights them on the map.
Now let’s select from these customers the ones with sales over $250,000 for the 2nd quarter.
To Select the Biggest Customers
- Choose Selection>Select by Condition or click
 Select by Condition in the Selection Tools drop-down on the Standard toolbar.
 - Choose [QTR2 Sales] from the Field List and > from the Operator List in the Condition Builder. “[QTR2 Sales] >” is added to the condition.
- Type “250000” to complete the condition.
- Choose Subset from the Selection Method drop-down list.
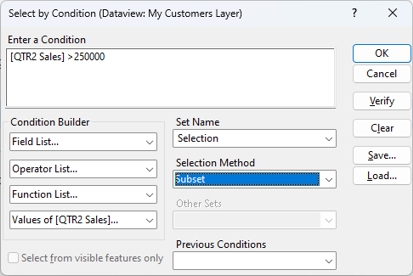
- Click OK.
Maptitude selects the customers with the highest sales from among those that were close to the city center and highlights them on the map. They may be difficult to see, so next we are going to hide the customers that are not selected.
If you want to learn more about selection sets, the selection tools, and selecting features based on attributes, see Filters, Queries, and Selection Sets.
To Map Only the Biggest Customers
- Choose Selection>Settings, or click
 Selection Settings in the Selection drop-down on the Standard toolbar to display the Selection Sets dialog box.
 - Click the Layer at the top of the scroll list and click Status to change the layer to invisible.
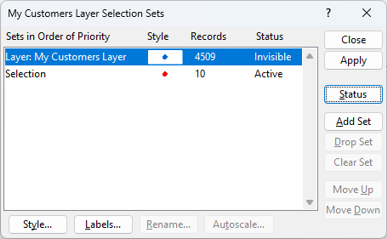
- Click Close.
Maptitude redraws the map with only the selected customer features visible.
- Click
 Zoom to Selection in the Selection drop-down on the Standard toolbar.
Maptitude draws the map zoomed in to show all of the features in the selection set.
Now let’s change the style of the big customers and add some labels.
To Change the Style of the Selected Customers
- Click
 next to the customer entry in the Display Manager to expand it and then expand the Sets entry.
 - Click the current symbol for the selected customers in the Display Manager.
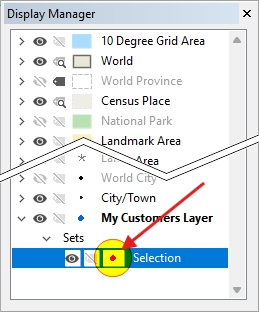
 |
TIP: You can also choose a selection set from the Current Selection drop-down list and click |
 in the Selection drop-down on the Standard toolbar to change the style of the active selection set.
- Choose a different symbol to use for the selected customers, change the size to 14 point, and choose a color you like.
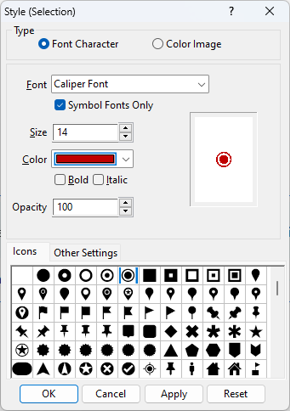
- Click OK.
To Label the Selected Customers
- In the Display Manager, click the
 symbol next to the customer selection set.
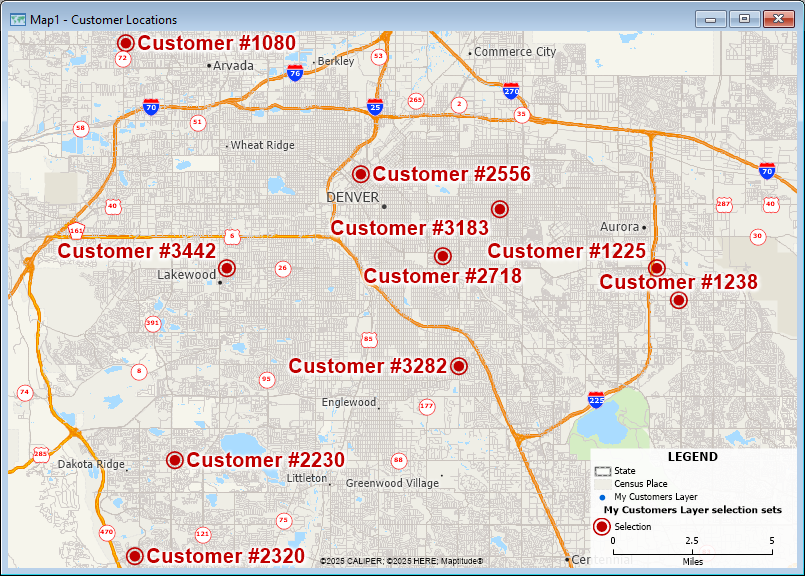
 - Choose [Customer Name] from the Field drop-down list. If you want, you can also change the font, size, color, or style of the labels.
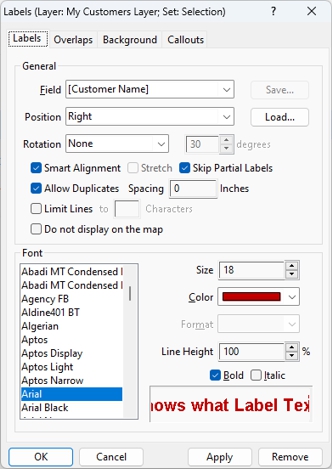
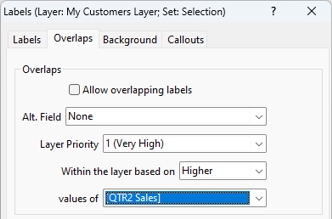
- Click the Overlaps tab and choose 1 (Very High) from the Layer Priority drop-down list. This ensures that your selected features will be labeled before anything else in the map.
- Choose Higher from the next drop-down and [QTR2 Sales] from the Values of drop-down. This ensures that your selected features with higher sales will be labeled before selected features with lower sales.
- Click the Background tab and click Halo in the radio list.
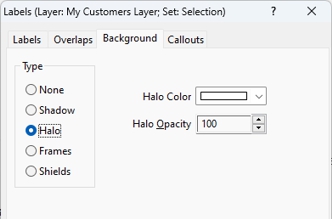
- Click OK.
Maptitude draws the map again, this time displaying the name of each customer. Your map should look like this:
Click  to save the changes to the workspace and move on to Stage 4: Finding a Route.
©2026 Caliper Corporation