|
Connect with Us Maptitude Solutions Learn how Maptitude can help your organization: Marketing & Sales Mapping Software International Mapping Caliper continues to offer new Country Packages for use with Maptitude, including: |
|
|||||||||
|
Featured Data Product: ZIP
Codes (USA) with 2011 Census Demographics
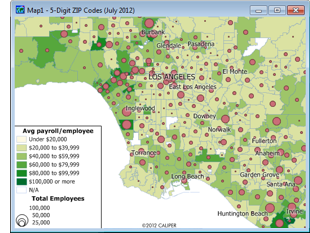
If you make business decisions based on postal data, Caliper quarterly ZIP Code updates will ensure you are using the latest information. The 5-digit ZIP Code Boundaries Data contains a nationwide area database with ZIP Codes for all 50 states, the District of Columbia, Puerto Rico, and the territories. It also includes a point database of ZIP Code centroids and 3-digit ZIP Code Areas for the entire country. Caliper updates this file quarterly to provide up-to-date access to United States Postal Service changes. The product comes with demographic data at no additional cost, including more than 400 fields from the 2011 ACS and 2010 U.S. Census for population, age, marital status, education, occupation, industry, race, income, housing values/characteristics/mortgages, rentals vs. owners, gender, Hispanic origin, mode of travel, and households by type. The 3-digit and 5-digit ZIP Code areas include 2009 ZIP Code Business Patterns (ZBP) NAICS codes with the number of businesses by detailed industry type (retail, finance, etc.), the number of employees and annual payrolls, and a classification of rural-urban commuting characteristics. Price: US$250. Place your order online at the Caliper Store Now. |
|||||||||
|
Tech Tip: Using the Create-a-Map Wizard™ to Add Coordinates to an Existing Map
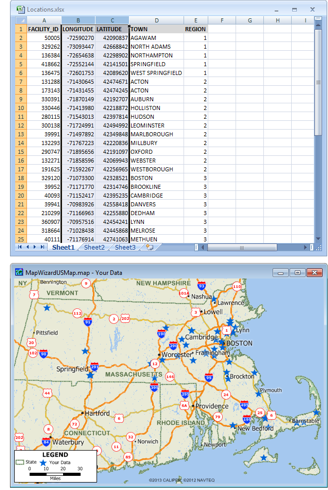
The following steps illustrate these new features by walking you through locating coordinate data in an Excel file on an open map in Maptitude 2013: 1. Use the Map Librarian to open one or more maps. (Choose Tools-Map Librarian then choose a Map Category and the Map(s) you Want. Click OK. If prompted type a location to zoom to and click OK. Maptitude opens the chosen map.) 2. Choose File-New, choose Map from the list of file types, and click OK. Maptitude displays the Create-a-Map Wizard dialog box. 3. Choose Map of My Own Data from the radio list and click Next. Maptitude displays the Choose the File that Contains Your Data dialog box. 4. Make sure that Excel Worksheet is the file type, browse for an Excel file that has Longitude and Latitude fields with values, and click Open. 5. When prompted, choose the Excel sheet that contains your data and click OK. 6. Maptitude finds the mappable fields in your data. Make sure the X Coordinate/Longitude and Y Coordinate/Latitude fields are correct. Click Next. 7. Check the box to Add your data to existing map and choose your map. 8. Choose the Locate records in your file by coordinates option. Click Finish. 9. Type a name for the new layer file and click Save. 10. Maptitude uses the coordinate data in your table to create a new point layer of your locations. A dialog box is displayed reporting how many records were located. Click OK. Maptitude displays your open map with the new point layer of locations it found in your data. |
|||||||||
|
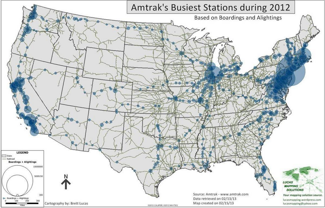
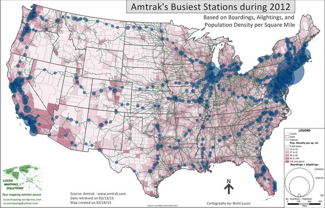
Featured Maptitude Maps: Busiest Amtrak Stations Across the United States This month we showcase Maptitude maps created by Lucas Mapping Solutions showing the busiest Amtrak Stations across the United States in 2012, with boardings and alightings in relation to population density per square mile.
If you would like to see your maps showcased here, please contact Caliper. |


 With Maptitude 2013
you
can control how features are added to selection filters.
  The
latest
 The
Map My Own Data tool in Create-a-Map Wizard now allows you to
both locate a table of coordinates (including longitude/latitude)
with auto-detection of the best fields to use, and add a
new layer to an existing map. These new Maptitude 2013 features
reduce the number of steps required to produce your maps.
