Maptitude Help / Using Themes to Present Information / 3D Themes
3D Themes
A 3D theme uses prisms to show the relative values of a data field where higher prisms indicate areas with higher values. A color theme is also used to emphasize the differences in the data values. Alternatively, you can choose to illustrate values from a second data field with the color option. 3D themes can only be created on an area layer, such as postal codes, states, or sales territories.
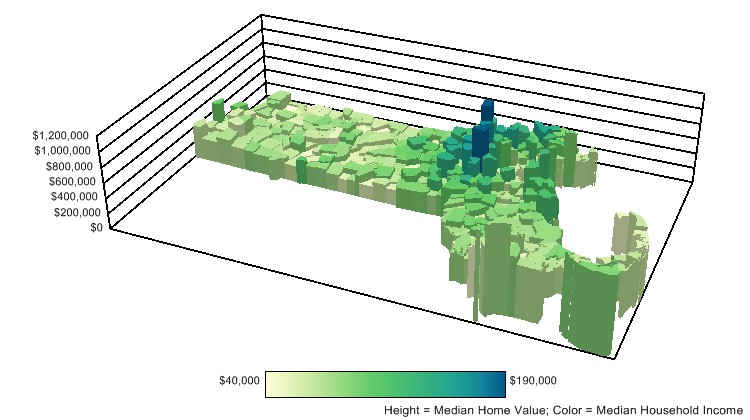
There are two important differences between 3D themes and the other types of themes:
- Maptitude can create a 3D themes in its own figure window alongside your current map.
- Maptitude reads the data for a 3D theme when the theme is created, so subsequent changes in the data are not reflected in the 3D theme. To have those changes reflected, you must recreate the 3D theme.
If you have elevation values and want to show the map on a surface, you can create a 3D map. For more information, see Surface Analysis Tools.
Creating a 3D Theme
You create a 3D theme by choosing the area layer you want to map and the numeric data field(s) you want to see. The theme can show all the visible features in the layer or a selection set. For more information on selection sets, see Filters, Queries, and Selection Sets.
Maptitude allows you to customize a 3D theme in a variety of ways:
- Add a title and/or footnote
- Display a legend
- Apply logarithmic scaling to your data
- Change the colors by selecting a predefined color set or by using the color ramp
- Adjust its orientation and height
You change the orientation of a 3D theme by adjusting the angles at which it is viewed. The viewing angle rotates the position of the map by degrees as if it were traveling around the face of a clock. The viewing angle can be set at any number between -180 and 180. The vertical angle tilts the map towards you or away from you at angles anywhere from 0 to 90 degrees, where 90 degrees is straight over it. You can also control the height of your 3D theme by setting a value between 1 and 100.
If your data set contains data with many similar low values and a few dramatically higher values, you may want to apply logarithmic scaling to your 3D theme. Logarithmic scaling will make the similar lower values easier to distinguish. It makes the higher values appear less dramatically different in size.
 |
For a video tutorial see: (Internet connection required) |
 To Create a 3D Theme
- Choose the area layer you want from the drop-down list on the Standard toolbar.
- Choose Map>Thematic Mapping>3D or click
 3D Theme in the thematic mapping drop-down on the Standard toolbar to display the 3D Theme dialog box.
 - Make choices as follows:
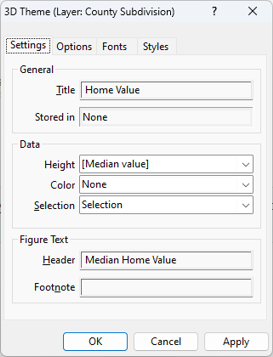
- Choose the field to use for the prism height from the Height drop-down list
- Choose the field to use for the color from the Color drop-down list or choose "None" to use the same field as the height field
- Choose whether to use all features, the visible features, or a selection set from the Selection drop-down list
- Type any title to display above the 3D theme in the Header box
- Type any text to display below the 3D theme in the Footnote box
 |
TIP: Once you have expanded the Height or Color drop-down list, type several letters to limit the fields to those containing the text you enter. |
- Click the Options tab to display the Options page and make choices as follows:
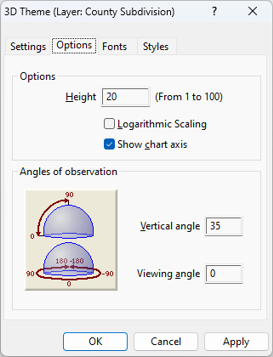
| To do this... | Do this... |
|---|---|
| Change the height | Enter a value in the Height box |
| Apply logarithmic scaling | Check the Logarithmic Scaling box |
| Show a legend | Check the Show chart axis box |
| Change the observation angles | Enter a vertical angle in degrees from 0 to 90 in the Vertical angle box and enter a viewing angle in degrees from -180 to 180 in the Viewing angle box |
- Click the Fonts tab to display the Fonts page and make choices as follows:
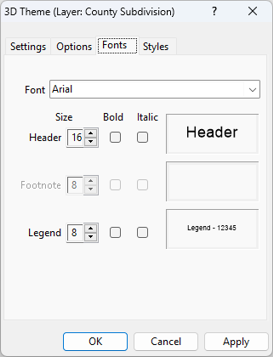
- Choose the font to use for the header, footnote, and legend from the Font drop-down list
- Specify the size and style for the header, footnote, and legend
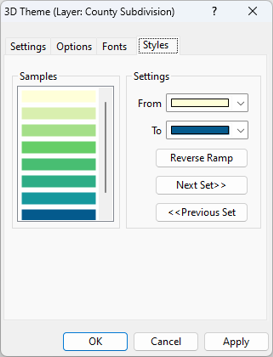
- Click the Styles tab to display the Styles page and make choices as follows:
- Click OK.
Maptitude draws the 3D theme with the settings you chose and displays the 3D Controls toolbar.
- Double-click on the 3D theme figure window, or right-click on the figure window and choose Properties, to display the 3D Theme Properties dialog box.
- Make changes to the 3D theme settings, options, fonts, or styles as described in steps 3 through 6 of the previous how-to.
- Click OK.
Maptitude draws the 3D theme with the changes you made.
|
TIP: You can also get to the 3D Theme Properties dialog box by clicking |
 on the Standard toolbar and then clicking
  in the Properties column of the theme you want to modify.
To Use the 3D Controls to Customize a 3D Theme
- If the 3D Controls toolbar is not visible, choose Tools>3D>3D Toolbar to display the 3D Controls toolbar.
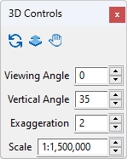
- Use the tools or spinners as follows:
 to activate the Zoom tool, click on the 3D theme, and drag up or down. When you release the mouse button, the Scale spinner will show the new scale. Alternatively, you can type a scale (the “1:” and commas are optional) and press Tab or click the up or down buttons in the Scale spinner.
 to activate the Pan tool, click on the 3D theme, and drag in any direction. Some part of the 3D theme must always be at the center of the window.
Try It Yourself: Creating 3D Themes
1. Choose File>Open Workspace or click  on the Standard toolbar, then open the NESouth workspace in the Tutorial folder.
2. Right-click on County in the Display Manager and choose Make Working Layer.
3. Choose Map>Thematic Mapping>3D or click 3D Theme in the thematic mapping drop-down on the Standard toolbar to display the 3D Theme dialog box.
4. Choose Population from the Height drop-down list and click OK. Maptitude displays a 3D theme of population by county. Counties with higher population are shown with taller prisms.
5. Double-click on the 3D theme to display the 3D Theme Properties dialog box.
6. Click the Options tab, and change the height to 15, the vertical angle to 50, and the viewing angle to -30.
7. Click the Styles tab, and click Next Set until you see a palette you like, or choose colors from the From and To drop-down lists to create your own palette.
8. Click OK. Maptitude updates the 3D theme with the new settings.
9. Click  in the 3D Controls toolbar and click and drag on the 3D theme to change the viewing and vertical angles.
10. Choose File>Close Workspace and click Don't Save to close the workspace without saving any changes.
Printing 3D Themes
Maptitude prints 3D themes to any installed printer. When Maptitude prints the 3D theme, it uses the same font size, styles, and settings that you see on the screen.
To Print a 3D Theme
- Choose File>Print, click
 on the Standard toolbar, or right-click on the 3D theme figure window and choose Print to display the Print dialog box.
 - Choose the printer and other settings.
- Click OK.
Maptitude prints the 3D theme. You can interrupt printing at any time by clicking the Cancel button.
 |
NOTE: To change paper size, orientation, or source, or to change other printer settings, click Properties in the Print dialog box. |
Saving a 3D Theme
Any 3D themes that you have open in your workspace are saved as part of the workspace. When you close and reopen the workspace, your 3D themes will be restored.
You can use the File>Export>Image command to save a 3D theme as a graphic file (e.g., BMP, JPEG, PNG) that can, for example, be added to a document or a web page. For more information, see Saving Maptitude Windows as Graphic Files.
©2026 Caliper Corporation