Last Updated: March 5, 2025
Some features in your Maptitude maps can look better if you make them slightly transparent, allowing you to see through them somewhat. This article will explain how to change the transparency of layers and some instances in which you may want to do this with your own maps.
How to Change Transparency
Changing the transparency of a layer is as simple as clicking on the style options for that layer and changing the number in the “opacity” box.
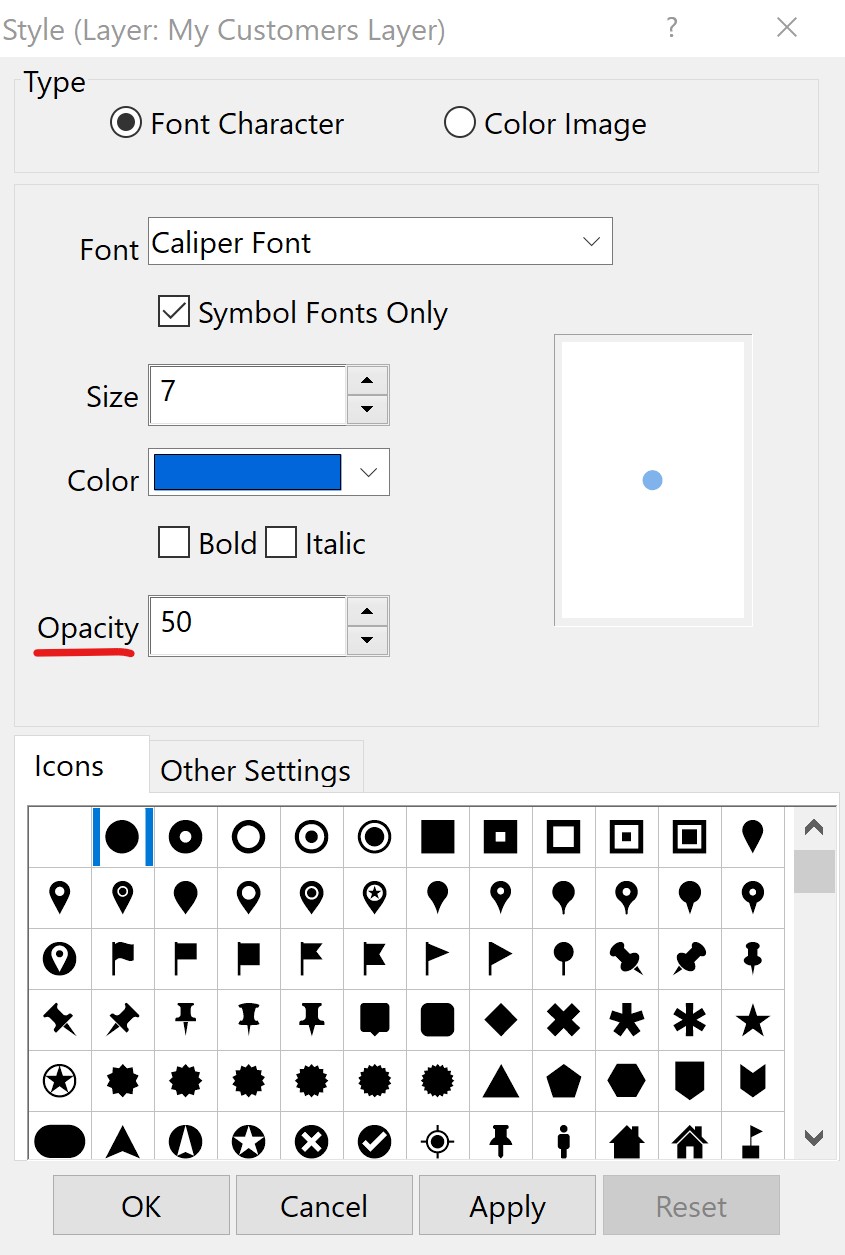
This number goes from 0-100, where 0 is invisible and 100 is solid (opaque). For details on changing layer styles using the display manager, see: https://www.caliper.com/learning/media/using-the-maptitude-display-manager/
Why to Change Transparency
Multiple Overlapping Points
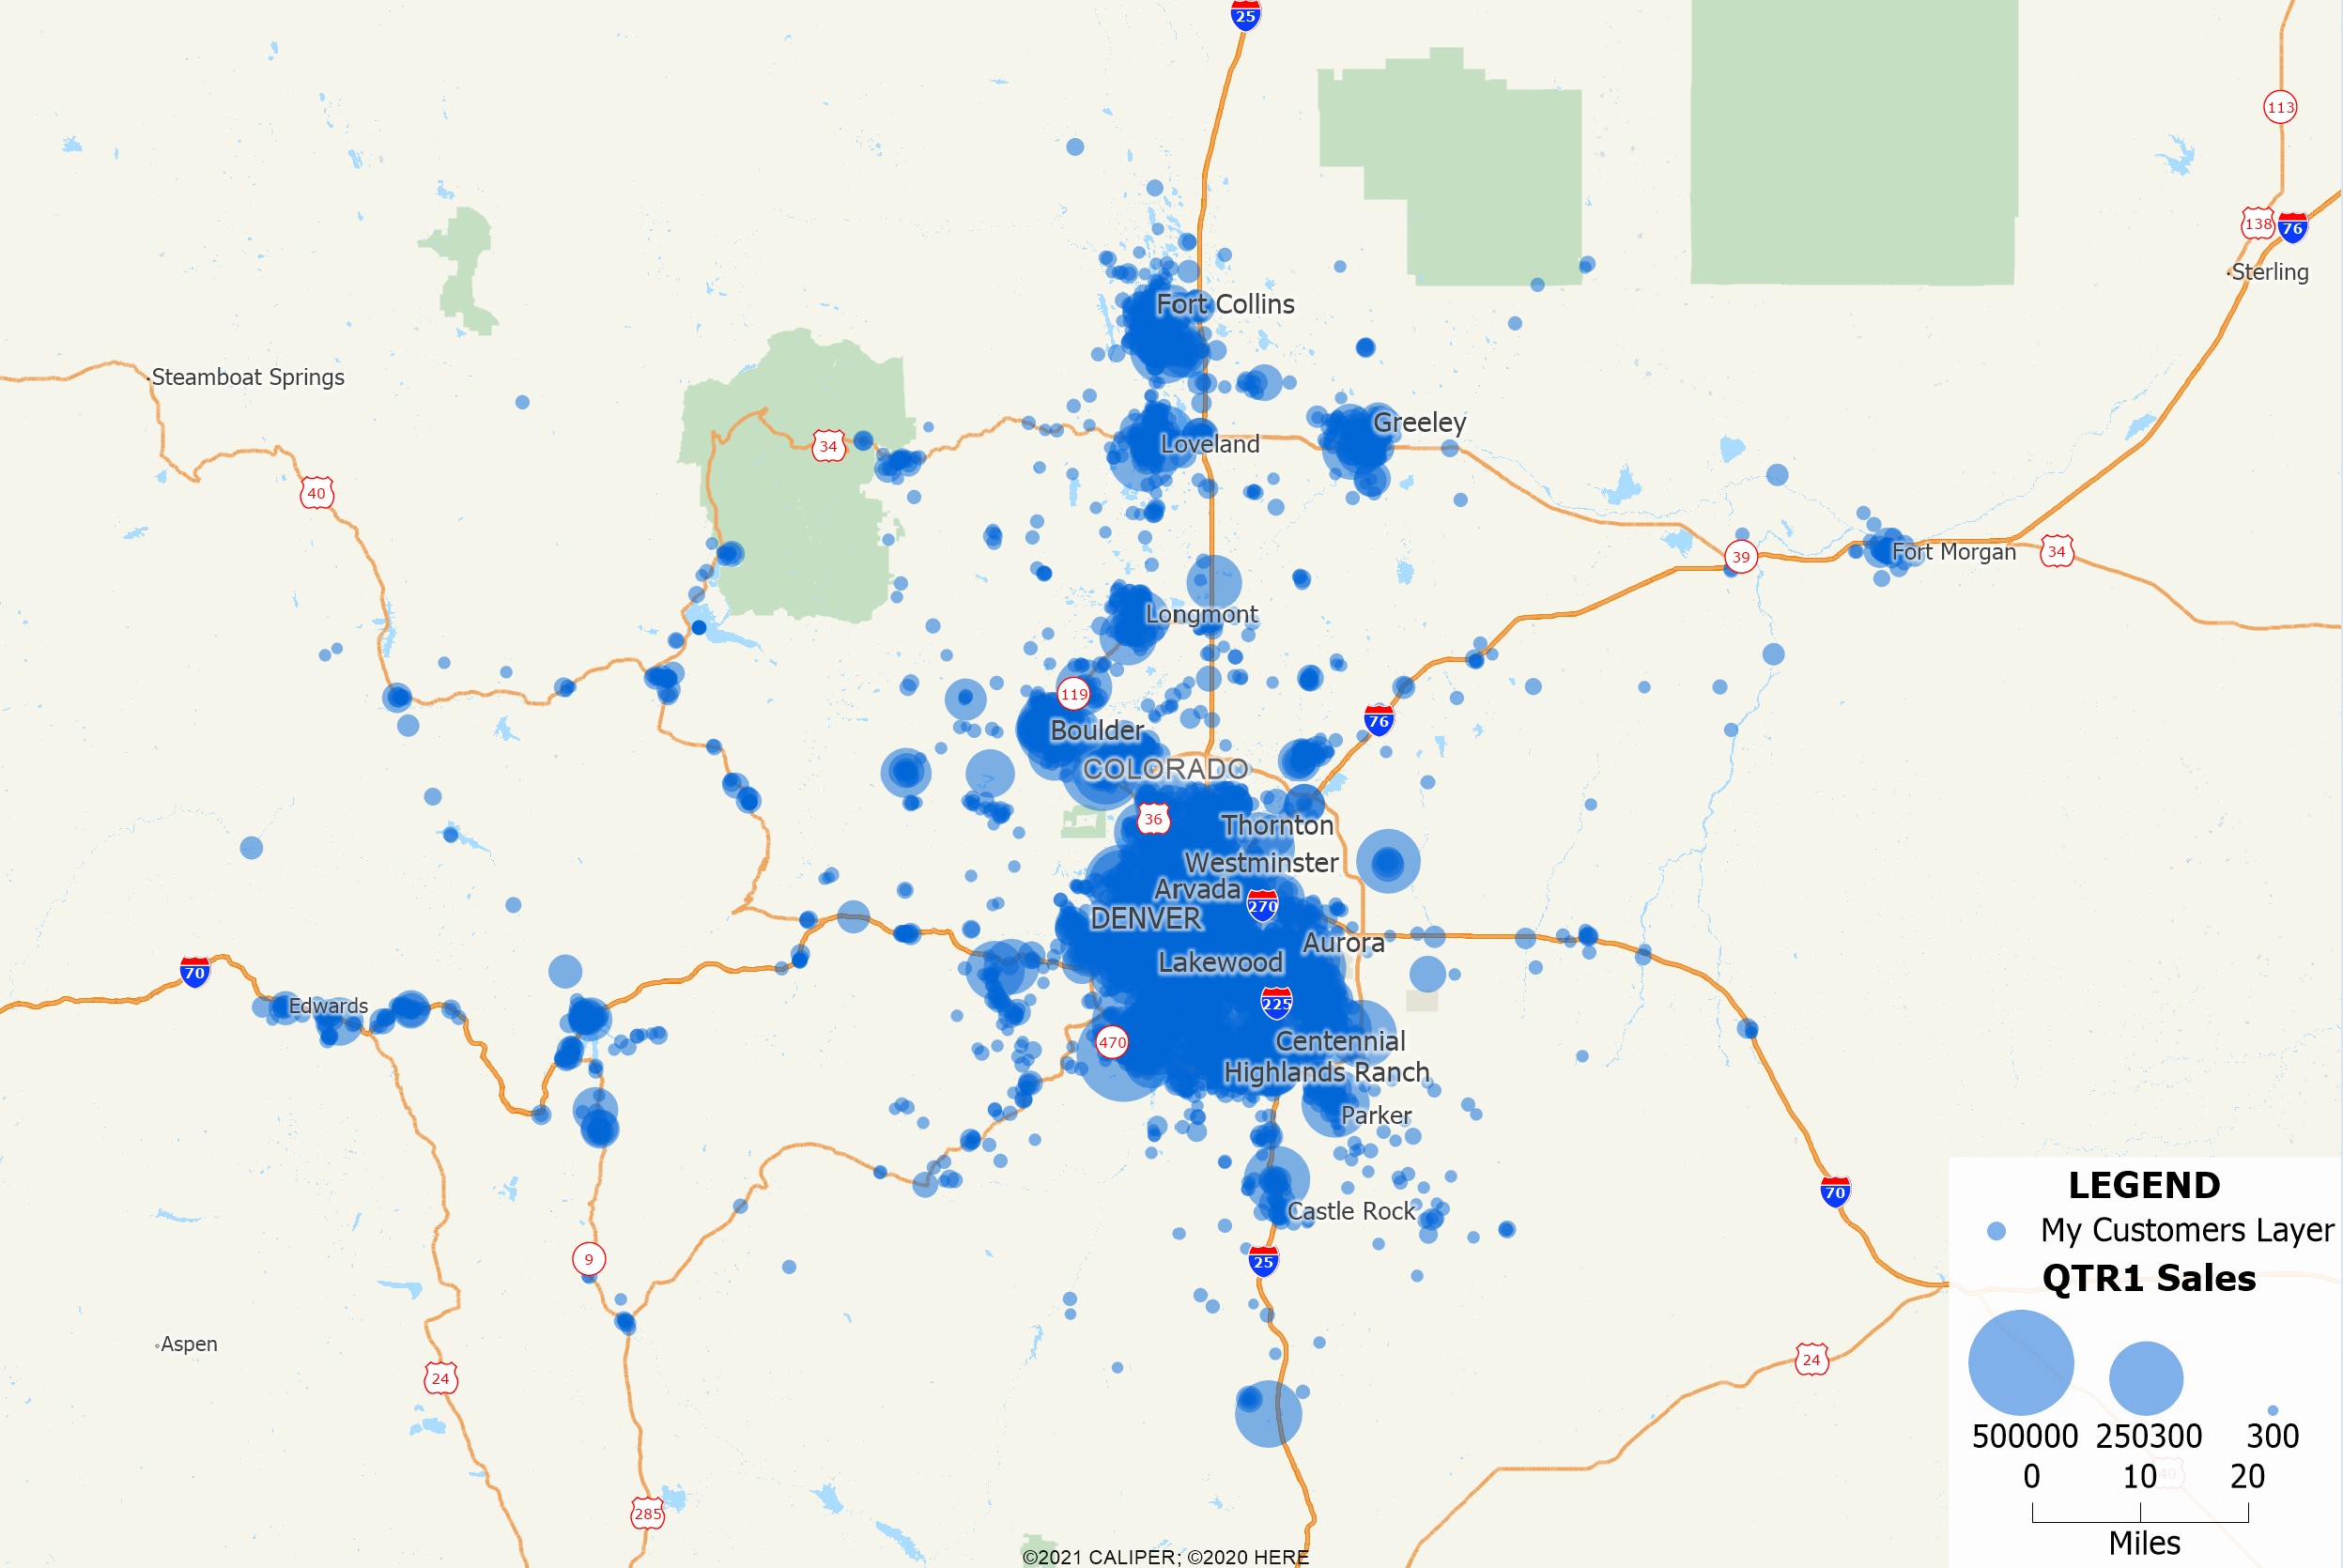
When you have a lot of points densely populating your map, increasing transparency can allow you to see all your points more easily when they overlap. Simply reduce the opacity of your point layer until you can see your points more clearly.
Detailed Boundaries and Boundaries
Outlines on polygons might be distracting and pull your audience’s attention away from the main thrust of your map. By lowering the opacity of your area boundaries you can focus more attention to the map topic. Change your borders or circular outlines, for example, to a less opaque value or to a color that complements the prevailing map colors. If the borders or outlines don’t support your message, try using 100% fill transparency to only leave the feature outline.
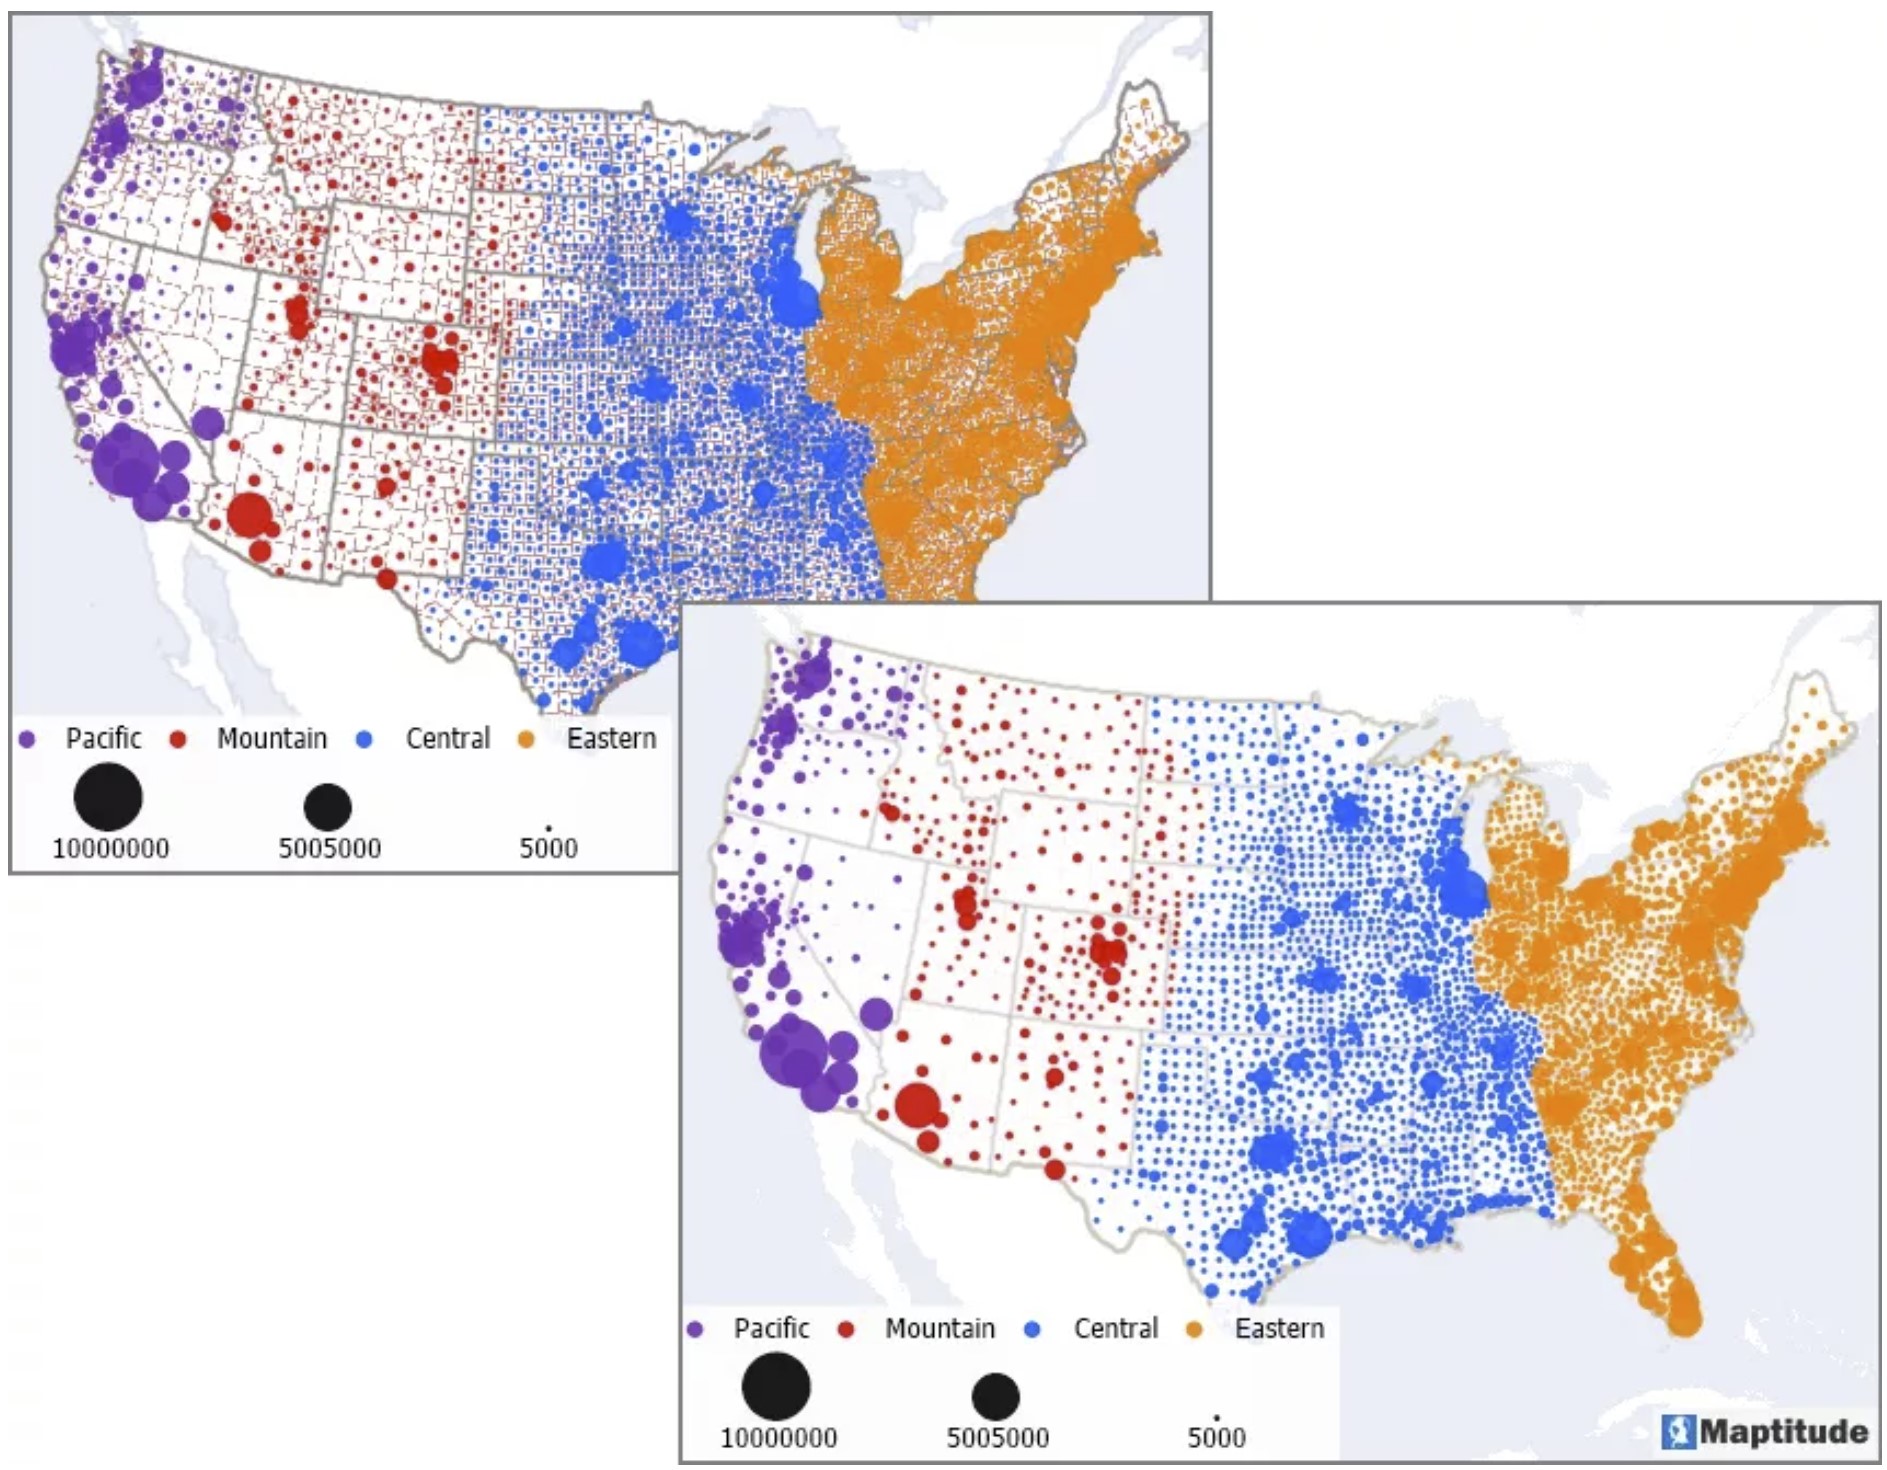
For example, the first map below contains a size and color theme on counties, but the strong county outlines conflict with the pattern it wishes to portray. By making the county boundaries mostly transparent and the state boundaries somewhat lighter, the data patterns in the second map are much clearer.
Pictures and Images
If you have an image in your map, such as satellite imagery, increasing transparency can let you superimpose that image without placing it in the background or covering anything up. This way, features such as rivers or lakes can still be visible in your map without obscuring the image.
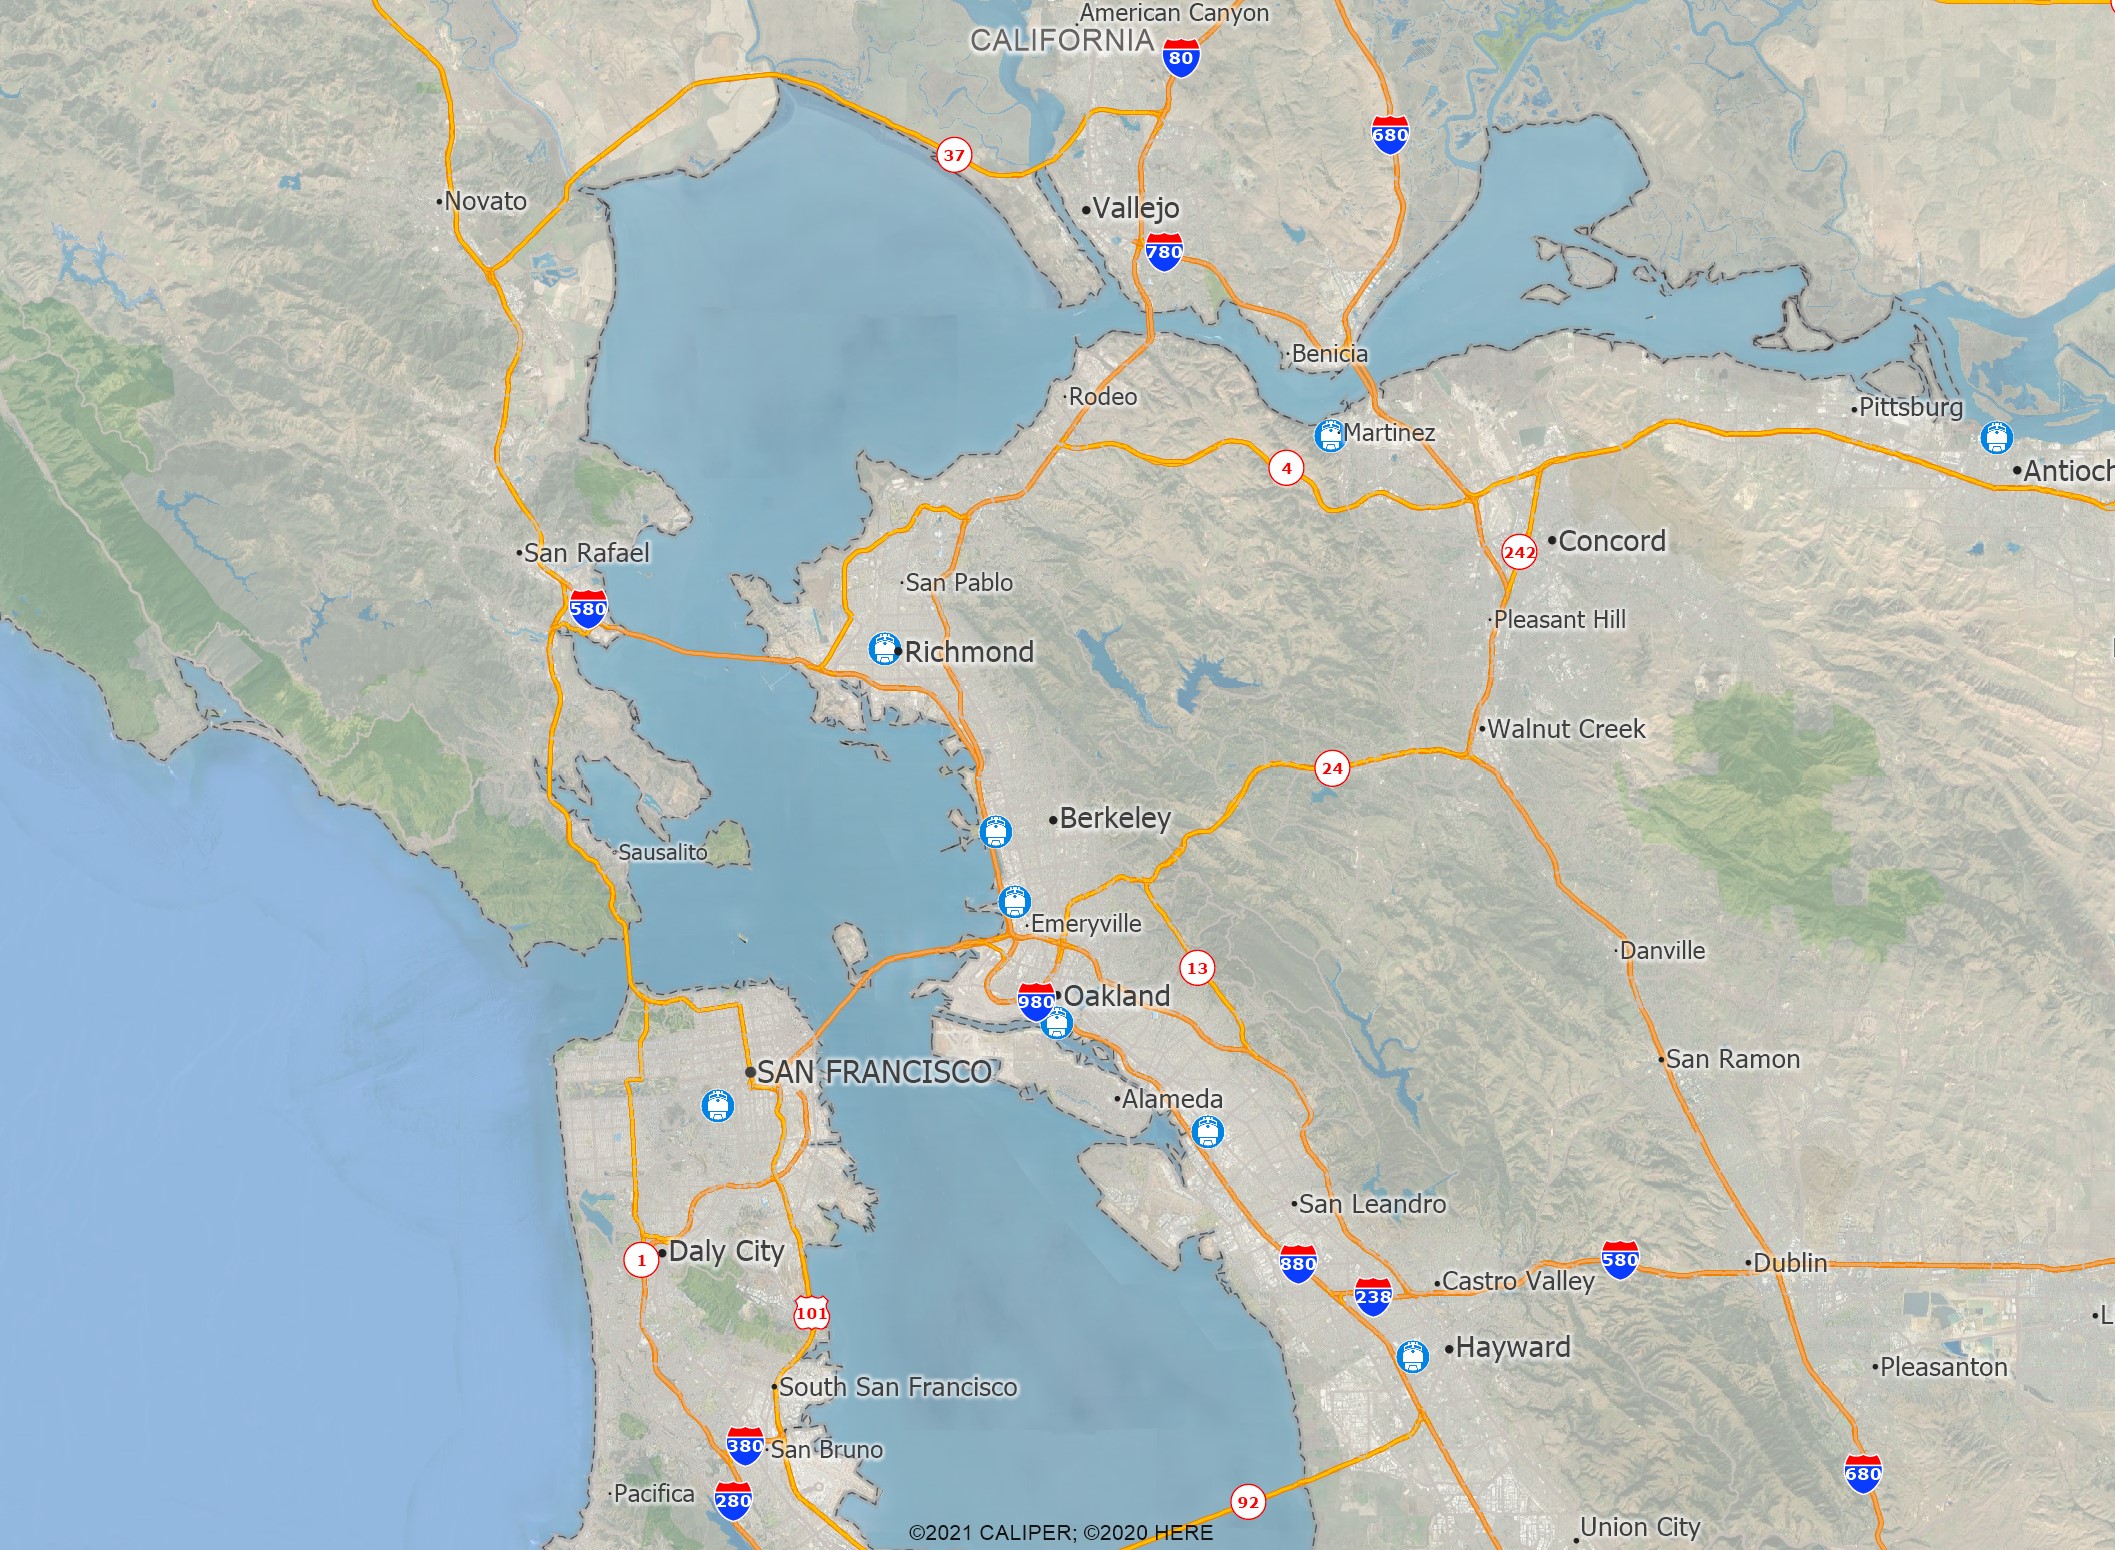
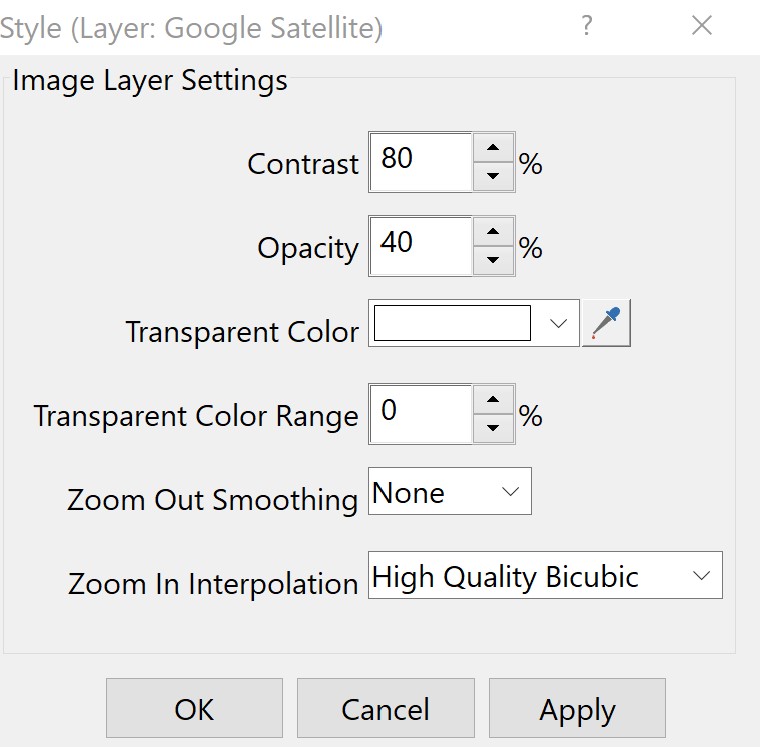
You can add imagery like this to your map using Map>Imagery and choosing one of the options from the menu. Once added, you can open the style for that layer in the display manger to specify the image opacity as well as contrast and the transparent color.
For additional details, see: https://www.caliper.com/learning/media/using-aerial-and-satellite-imagery-in-a-maptitude-map/
Thematic Mapping
Another reason to change is transparency is to accent your color or size themes and make patterns more comprehensible. You can decrease the opacity of every subsequent group in your theme by an increasing amount to make your biggest/most important features pop and make your smaller/less important features easier to see through.
For example, the first map below contains a size and color theme of traffic on highways where all of the highways are 100% opaque. By making some of the theme classes transparent, the busiest roads are more apparent and the less busy ones fade into the background.

For additional details on thematic mapping, see: https://www.caliper.com/learning/media/how-to-make-a-thematic-map-in-maptitude/