Last Updated: July 22, 2025
You can create a report and map showing business locations near your site using business mapping software.
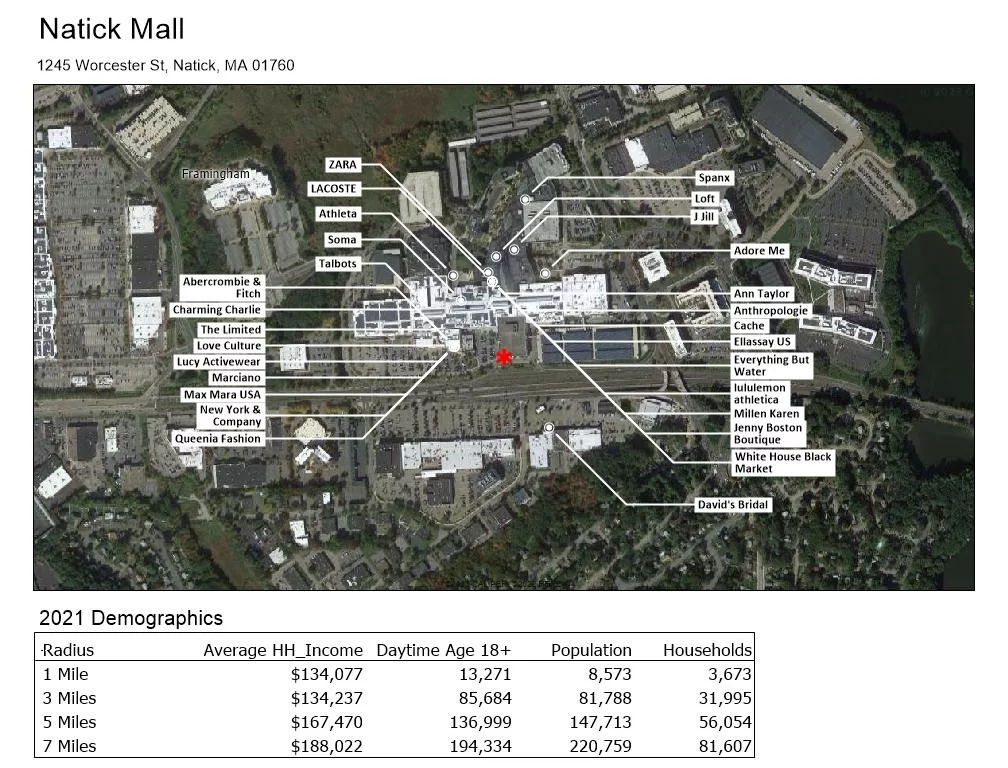
Whether you are looking to open a new store or move to a new office space, a map showing the demographics and businesses around your location can provide valuable information on the location’s efficacy and viability. These maps and reports would be useful for making real estate decisions for site selection.
Locate Your Site
- Download and install a free trial of Maptitude mapping software, or use your own license of desktop Maptitude.
- From the Maptitude Home page, choose the New map of country option.
- Use the options in the Area to Display in the Map list to show the location of interest.
- Click Finish to open the map.
- Optionally, you can add satellite imagery by following the imagery tutorial video.
Calculate Demographics Around Your Site
There are several ways you can calculate the demographics around your site.
- Buffer Analysis: To find demographics in a straight-line radius around your location, use a buffer analysis.
- Drive-Time Ring Analysis: To compute demographics in a drive-time or drive-distance ring around your location, use the drive-time ring analysis.
Add Business Logos to Your Map
It may be appropriate to show the business locations using logos if you are interested in less than 5 businesses.
- If you haven’t already, download the Business Location layers from the Caliper Store.
- Go to Map>Layers>Add Layer and go to C:\ccdata\_ 202X Business Location Layers\
- Add the business layer(s) that you want to see on the map.
- Click Close to return to the map.
For more information about using your logos for point icons, please refer to this Maptitude learning article on using your company logos for point icons.
Add Business Labels to Your Map
If you are looking to see all the businesses in a category (such as clothing stores) around your site, choosing to show logos for each location may make the map too busy.
Instead, you can choose to use labels to show the locations of businesses.
- If you haven’t already, download the Point of Interest (POI) layers from the Caliper Store.
- Go to Map>Layers>Add Layer and go to C:\ccdata\USA 202X Point of Interest (POI) Layers\
- Add the business category that you want to see on the map.
- Click OK to return to the map.
- Optionally, you can use the Custom Labels with Callout button in the Standard Toolbar to move around the labels of the businesses.
For more information about mapping businesses, please refer to this Maptitude learning article on mapping business locations.
For more information about importing a layer of points of interest, please refer to this Maptitude learning article on downloading the free point of interest layer.
Create a Layout Report
Finally, you can create a layout report to show your site map and demographics in a single document by following the layout report tutorial video or layout report webinar.