You can select the fields shown in your map using data mapping software.
In Maptitude, you can use the Info tool to click on a map feature and show all the data associated with that feature. To learn more about the Info tool, please see Maptitude Info Tool video tutorial.
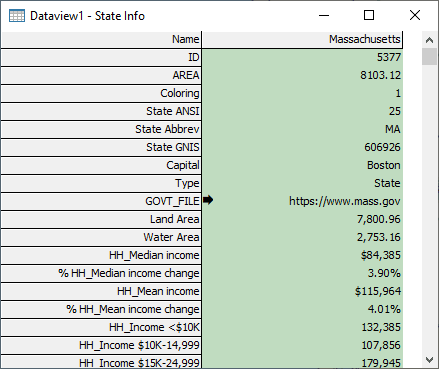
In this article, we will be using Field Sets to filter the fields shown by the Info tool:
- Make the layer you want to examine the working layer.
- Use the Info tool to open the Info dataview for one or more features.
- In the Info dataview, right click any cell and choose Field Sets…
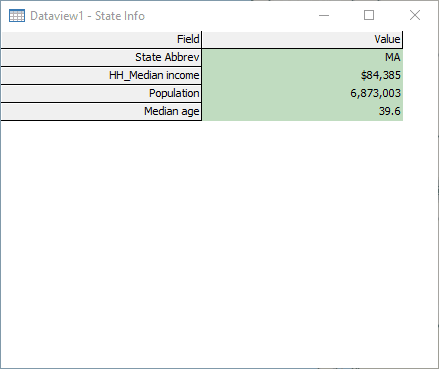
- Click Add… to define a new field set.
- Use the Define Field Set window to choose the fields you want to show in the Info dataview.
- When you are done, click OK and enter a name for your Field Set.
- Click OK, the Info dataview now shows the fields that you chose.
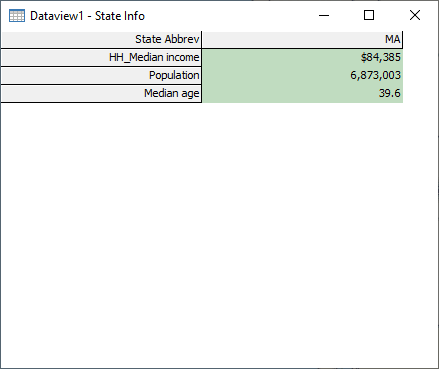
Optionally, you can also change the header of a dataview to be a specific field. Right click a row in the Info dataview and select Freeze. The selected field is now the header of the Info dataview.
To visualize the data on the map, please see Maptitude tutorial video on thematic mapping.
To create a demographic map, please see Maptitude tutorial article on creating a demographic map.