Last Updated: March 5, 2025
Each year, the Maptitude Team releases detailed industry data from the ZIP Code Business Patterns. This allows you to add more data to your Maptitude reports and maps. The Census Bureau developed the ZBP as an annual series to provide economic data by industry. These data include the number of establishments, employment, first quarter payroll, and annual payroll. Much of the data are organized by the NAICS, standardized codes used by the federal government to track and analyze industry and establishments.
NAICS codes explained
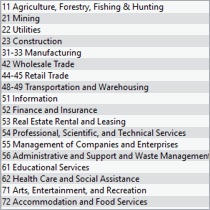
NAICS is a 2- through 6-digit hierarchical classification system, offering five levels of detail. Each digit in the code is part of a series of progressively narrower categories, and the more digits in the code signify greater classification detail. The first two digits designate the economic sector, the third digit designates the subsector, the fourth digit designates the industry group, the fifth digit designates the NAICS industry, and the sixth digit designates the national industry. The 5-digit NAICS code is the level at which there is comparability in code and definitions for most of the NAICS sectors across the three countries participating in NAICS (the United States, Canada, and Mexico). The 6-digit level allows for the United States, Canada, and Mexico each to have country-specific detail. A complete and valid NAICS code contains six digits.
Note: For instructions on how to download and add the layer to your map please refer to this article: How do I download the free ZIP code business Data?
Showing only the sectors of interest
Often, the only data relevant to your organization may be those within a specific two-digit sector. You can choose to limit dataviews to show just the data in a specific sector using the predefined Field Sets that are provided.
- In the Display Manager, right-click on the 5-Digit ZIP Business layer and choose New Dataview.
- Choose Dataview>Fields>Show/Hide Manager.
- Choose the two-digit sector of interest from the scroll list and click OK.
To create your own custom field set
- Choose Dataview>Fields>Show/Hide Manager and click Add.
- Click Clear to begin with an empty set.
- Highlight the fields in the Available Set scroll list you want to include in the Field Set and click Add. You can enter some text in the Filter edit box to narrow the list of available fields.
- Click OK. Maptitude prompts you to name your custom field set.
- Enter a name and click OK.
- To view your new Field Set, choose it from the list and click OK. Maptitude displays only the fields included in your custom set.