Last Updated: August 6, 2025
Maptitude allows you to link your map layers, point, area, or territory, to external data files, such as Excel spreadsheets. This is especially useful when your data changes frequently, and you want your map to stay up to date with minimal manual work.
For example, you might have a weekly sales spreadsheet with customer addresses or store locations. Instead of re-importing the data every time, you can link the file so Maptitude reflects any additions, deletions, or updates automatically.
This article focuses on when and how to use live link functionality. To follow these steps, download and install a free trial of Maptitude mapping software, or use your own license of desktop Maptitude.
Table of Contents
Supported Layer Types
Creating a Linked Point File
Creating a Linked Area File
Creating a Linked Territory File
Supported Layer Types
There are three types of layers you can link to your source data:
- Point Layers (e.g., customer/store locations)
- Area Layers (e.g., ZIP Codes with sales totals)
- Territory Layers (e.g., regions based on a defined hierarchy)
When you link your point data, you MUST choose a column that contains unique IDs for each record in your database or spreadsheet.
| Layer Type | Use Case | Unique ID Required | Created With |
| Point (Pushpin) | Geocoded locations like stores/customers | Yes | Create-a-Map Wizard |
| Area (Heat Map) | Totals by ZIP, county, etc. | No | Create-a-Map Wizard |
| Territory | Hierarchical regions | No | Territory Wizard |
Creating a Linked Point File
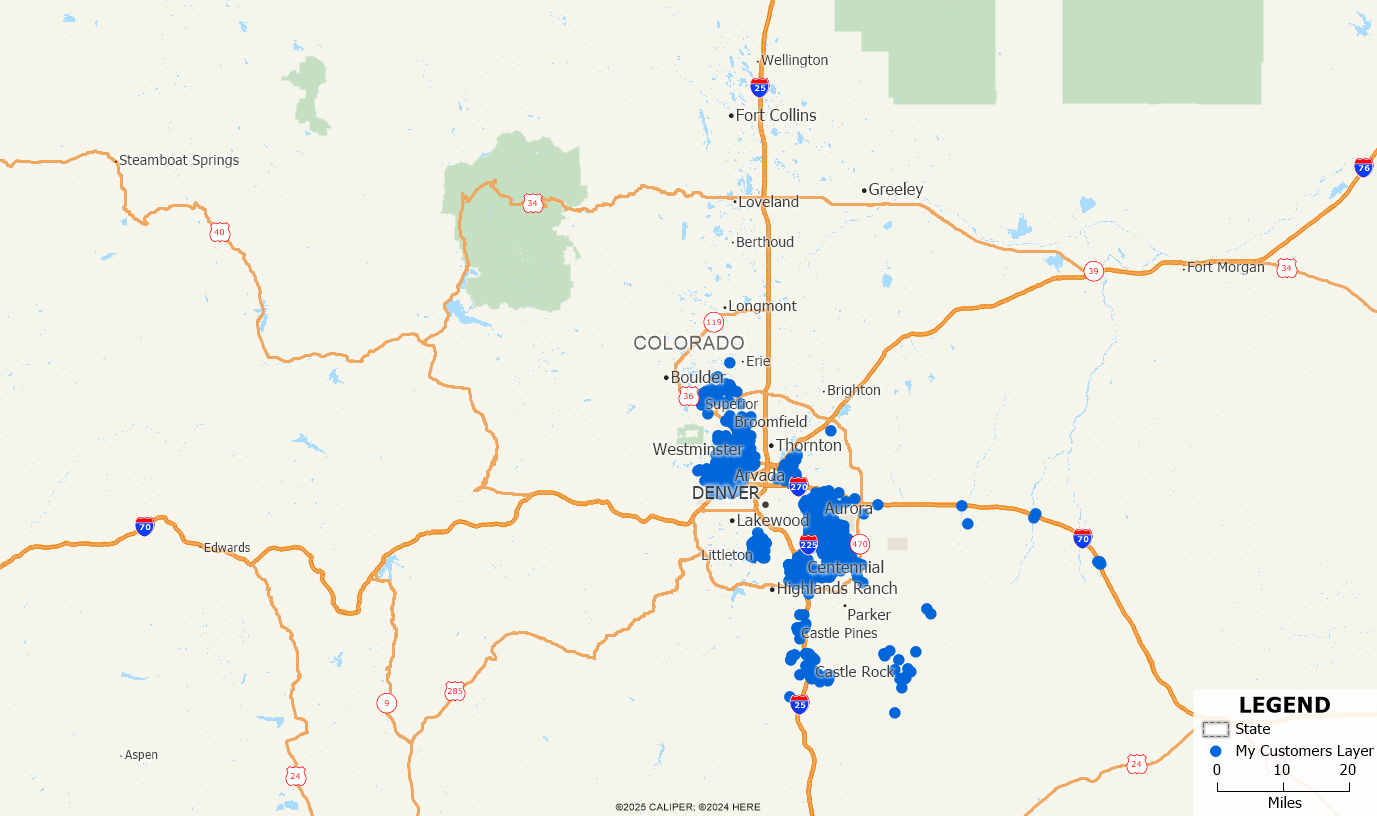
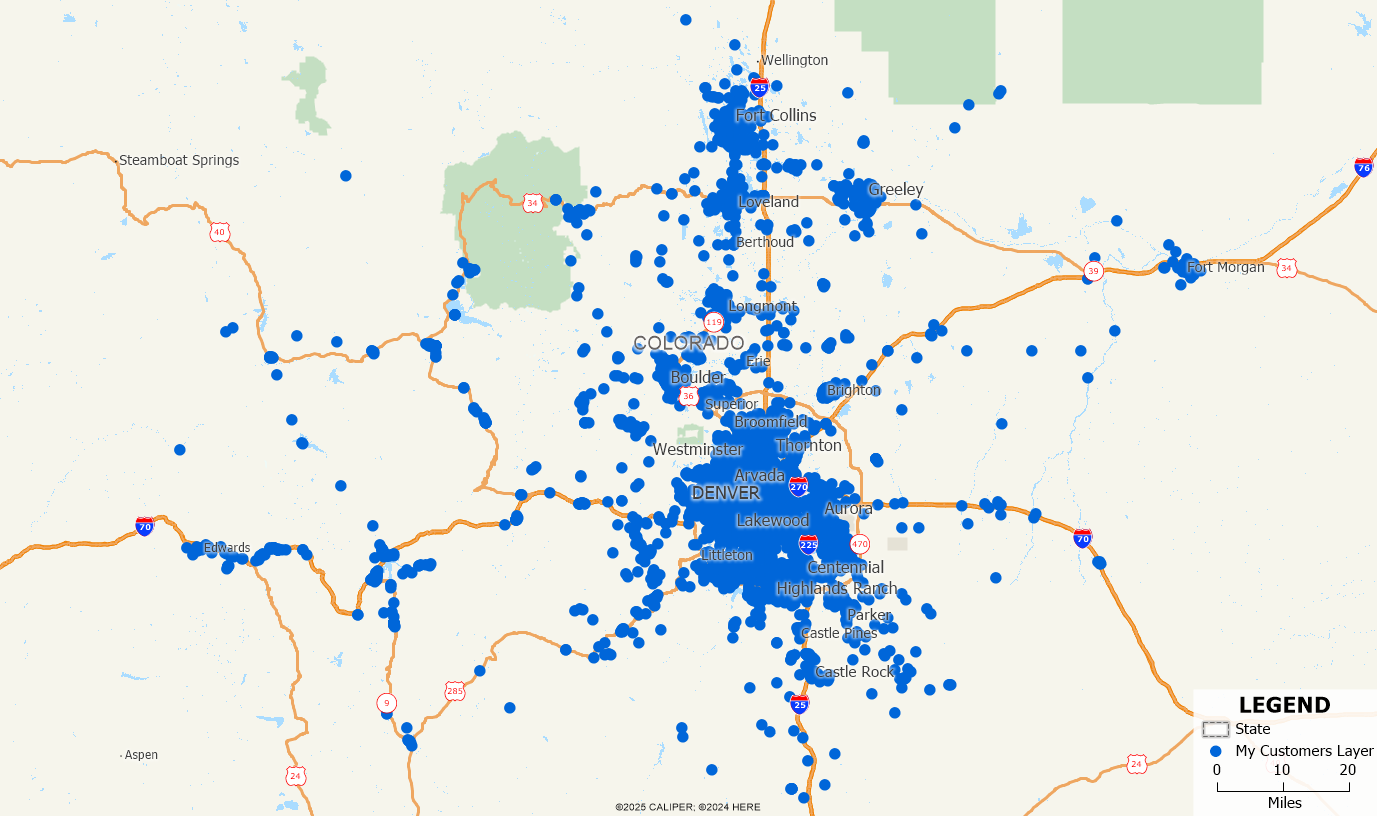
Use this option when you have address-based records that may change over time, such as store locations or customer lists. This includes adding new records, deleting old records, changing addresses or updating values such as sales amounts
The following steps describe how to create and update a linked point file:
- From the Home Window, choose New map of my data/table/spreadsheet and click OK. Follow the steps in the Create-a-Map Wizard to create a point layer from your data.
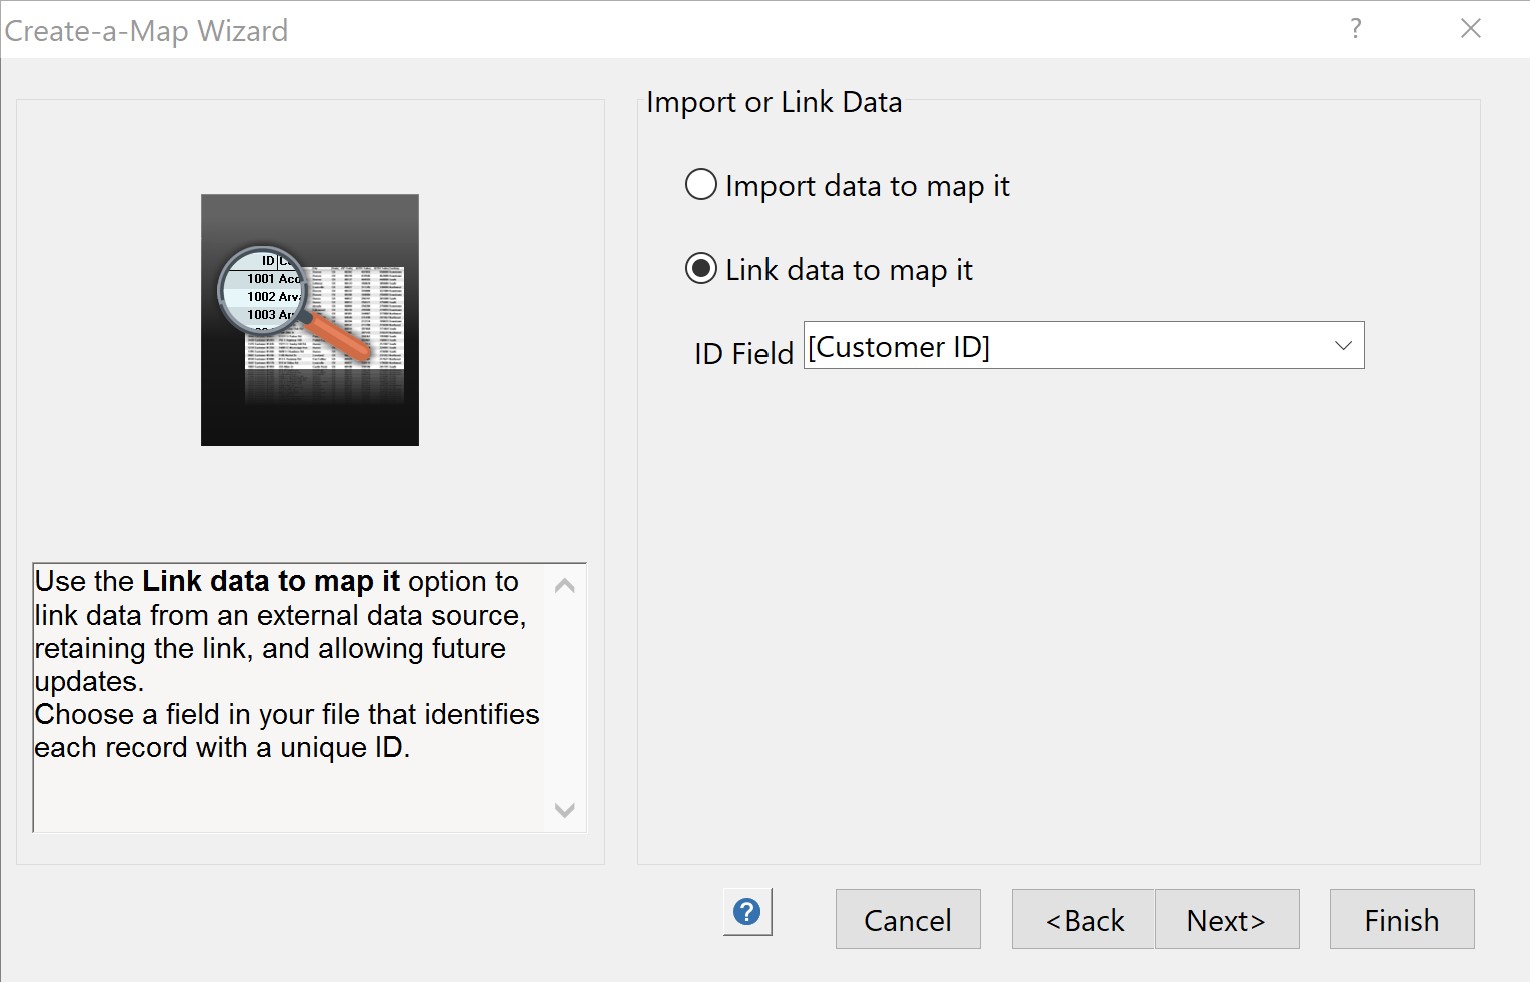
- When Create-a-Map Wizard prompts you to import or link data, choose Link data to map it and choose a field that contains unique IDs for each record from the ID Field drop-down list.
- Continue through Create-a-Map Wizard, choosing any theme or analysis options along the way.
- Maptitude creates a point layer from your data and displays a report with the results. Click OK to close the report and see the point layer on a map.
- Choose File>Save Workspace As and save your workspace to a location on your computer.
- When you next update your data file (e.g., update sales information, add or remove customers), open your saved workspace in Maptitude and choose Map>Update Linked Records. Maptitude updates the map with the new data. If your map contains any themes, the themes will now be based on the new data. Any records that were added will be added as new points on the map. Any records that were deleted will no longer appear as points on the map.
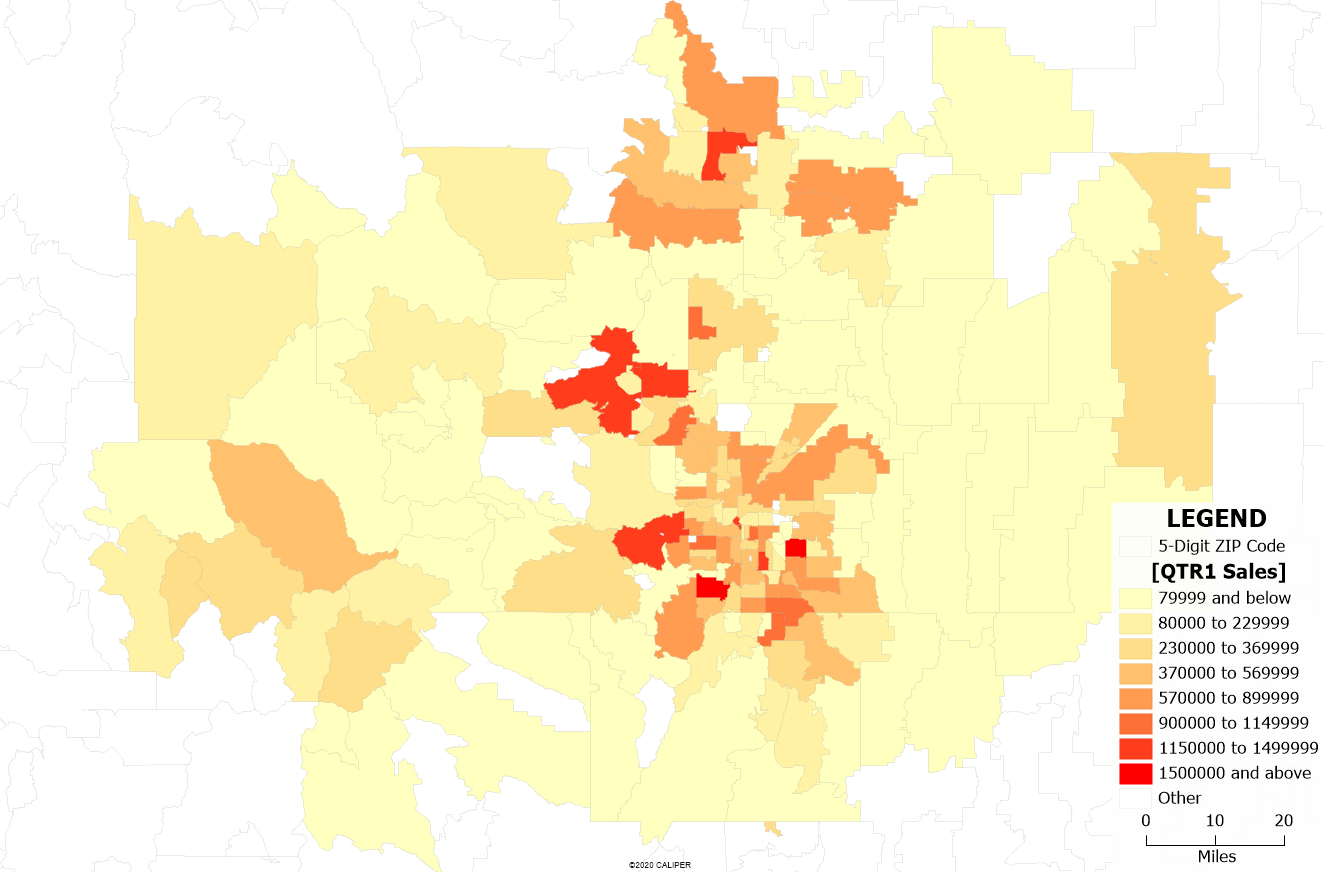
Creating a Linked Area File
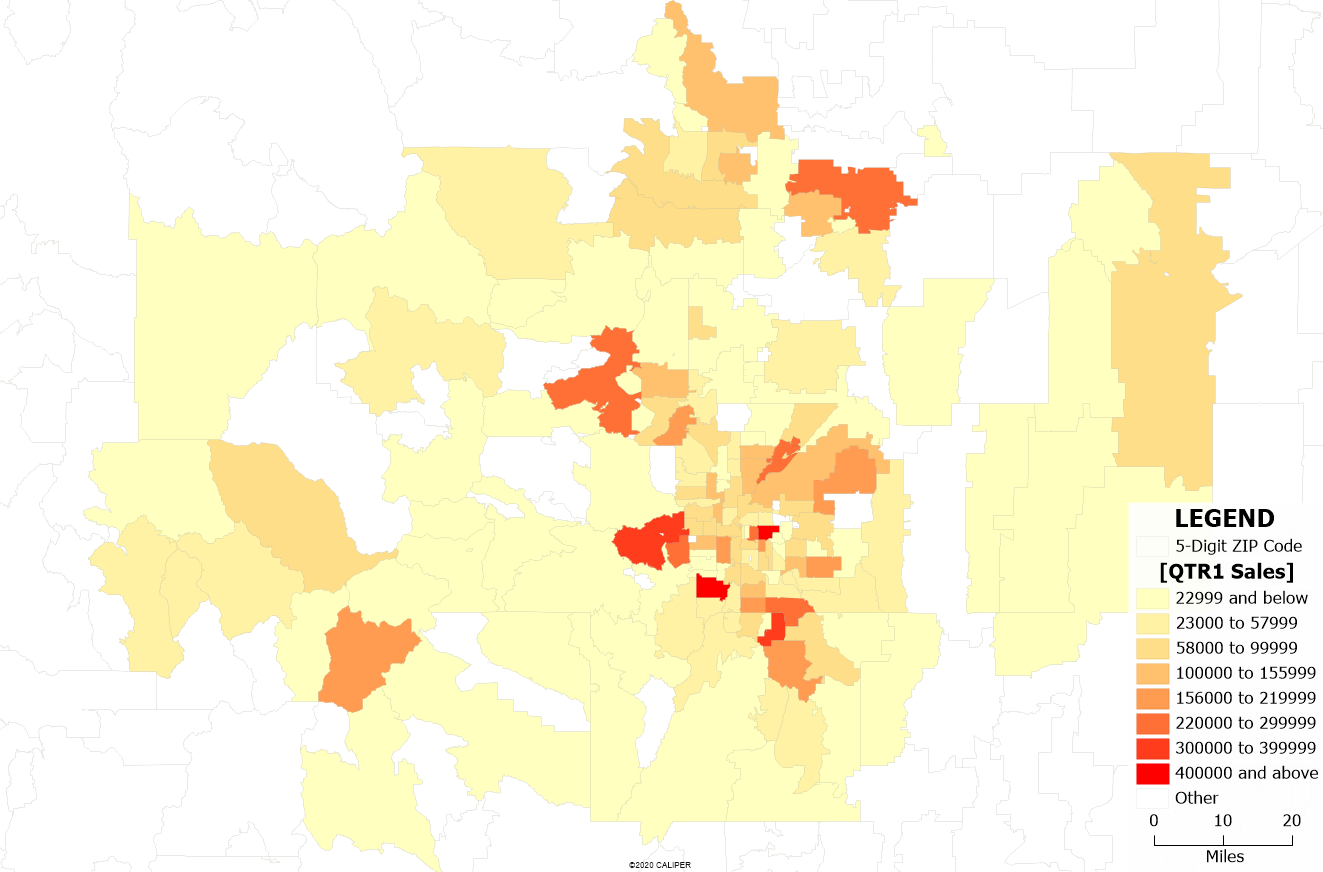
If you join your data to an existing geographic area layer and apply a theme, e.g. showing a Color Theme of Sales by ZIP Code, then you can also link the file so that any changes are reflected. Any changes made to the source data that affect the totals for the areas, such as adding records, deleting records or updating values will be reflected in the map and the theme will change accordingly. The following steps describe how to create and update a linked area file:
- From the Home Window, choose New map of my data/table/spreadsheet and click OK. Follow the steps in the Create-a-Map Wizard to show boundaries with your data attached.
- When Create-a-Map Wizard prompts you to import or link data, choose Link data to map it. In this case, an ID column is not required.
- Continue through Create-a-Map Wizard, choosing any theme or analysis options along the way.
- Maptitude creates an area layer from your data and displays a report with the results. Click OK to close the report and see the area layer on a map.
- Choose File>Save Workspace As and save your workspace to a location on your computer.
- When you next update your data file (e.g., update sales information, add or remove customers), open your saved workspace in Maptitude and choose Map>Update Linked Records. Maptitude updates the map with the new data. If your map contains any themes, the themes will now be based on the new data. Any records that were added will be added as new points on the map. Any records that were deleted will no longer appear as points on the map.
Creating a Linked Territory File
The following steps describe how to create and update a linked territory file:
- From the Home Window, choose New map of my territory data/table and click OK.
- Choose From my territory table, select your territory table, and then follow the steps in the Territory Wizard to create a territory layer from your data.
- When Territory Wizard prompts you to import or link data, choose Link data to territories and click Next.
- Continue through Territory Wizard, adding any hierarchies or tracking fields along the way.
- Maptitude creates a territory layer from your data and provides a territory manager for you to manage your layer.
- Choose File>Save Workspace As and save your workspace to a location on your computer.
- When you next update your data file (e.g., update sales information, add or remove customers), open your saved workspace in Maptitude and choose Map>Update Linked Records. Maptitude updates the map with the new data.
If the Live Link functionality does not seem to be working, please see the following article.