Last Updated: March 5, 2025
You can show multiple routes on a map using route planning software.
This article goes over how to create multiple routes, switch between them easily and show them both geographically on your map. You can also check out our deliveries and pickups routing tool, which allows you to route multiple vehicles at the same time.
To follow along with this tip, you will need your data split into several selection sets, each set representing one route. See Working with Maptitude Selection Sets for help with getting these set up. You can also follow the steps in the clustering tool tutorial article to use the clustering tool to set them up automatically.
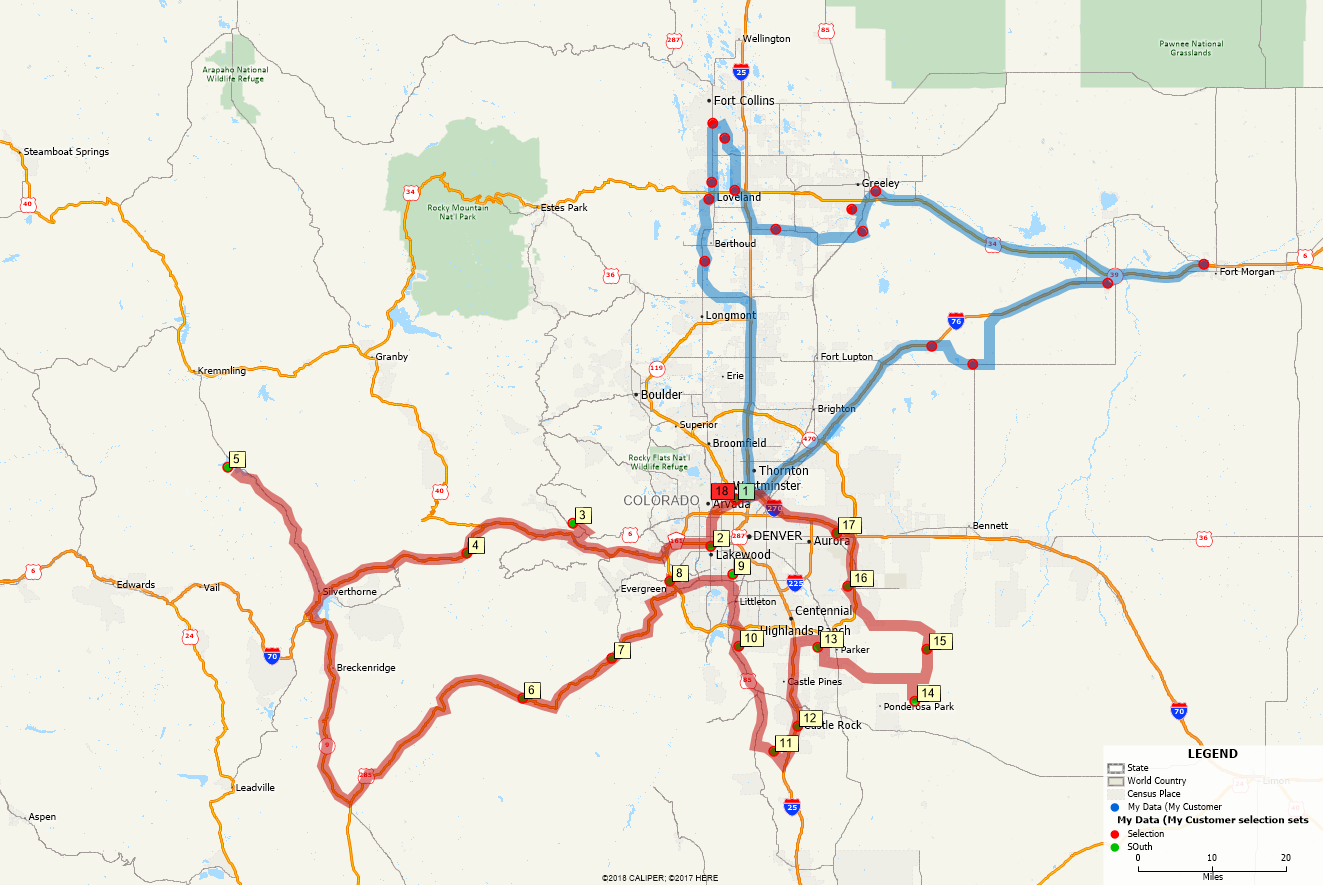
In this example we will be creating two routes from two selection sets called North and South on the layer My Data.
Step 1: Create the route
In this step we will create each route separately and save the routes to a file. Then we will run through at the end putting all the routes from a file onto the map.
- Click
 to open the routing manager
 - Choose Create a New Route and name the route North Route.
- Click

- For Layer choose My Data
- For Selection Set choose North
- For Order by choose None
- For Stop Name choose the field in your data that contains the name of each stop
- Click OK
- Click
 and under Routing Options set the color you want displayed for this route. This should be different for each route. I will start with Blue.
 - Click OK.
- Click Optimize.
- Click
 and repeat Steps 2 to 7 for each selection set of points, changing the name of the route in part 2, Selection Set in part 3, and the color in part 5 as needed.
Step 2: Add the routes to the map
When the route is created, the roads traveled are highlighted in the selected color. This highlight is usually removed when a route is removed from the Routing Manager, but we can copy it to create a highlight that is independent from the route and works just as if you have drawn it yourself.
- Click , choose Open an Existing Route, and open one of the previously created routes.
- Right-click somewhere on a highlighted section of road and choose Duplicate. The new route annotation will appear exactly where the original was created, ensuring it remains aligned with the roads.
- When the copy of the route lines up with the original, repeat steps 1 and 2 for all other saved routes.
For more information on creating routes in Maptitude, please see the Routing Manager tutorial video.
To create routes for each day of the week, please see the Delivery and Pickup tool tutorial article.