Last Updated: December 10, 2024
You can create balanced territories for your stores using sales territory mapping software.
Balancing territories according to the number of stores per territory or some other metric is a difficult task.
Maptitude makes this easy with a tool that creates balanced territories automatically.
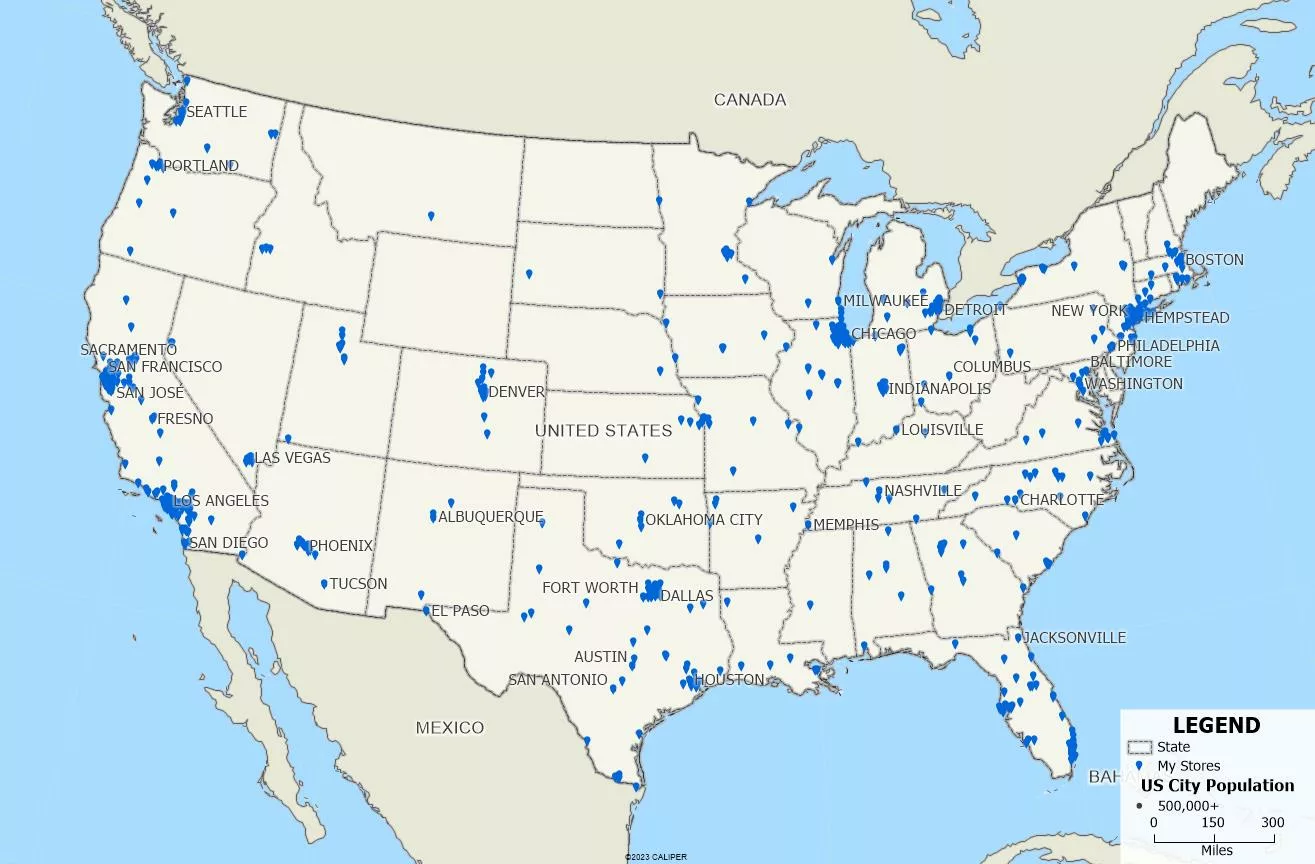
Map your stores
You can map your stores from a table by following the tutorial video on the Maptitude Create-a-Map Wizard.
After doing so, you can proceed with the rest of the tutorial below.
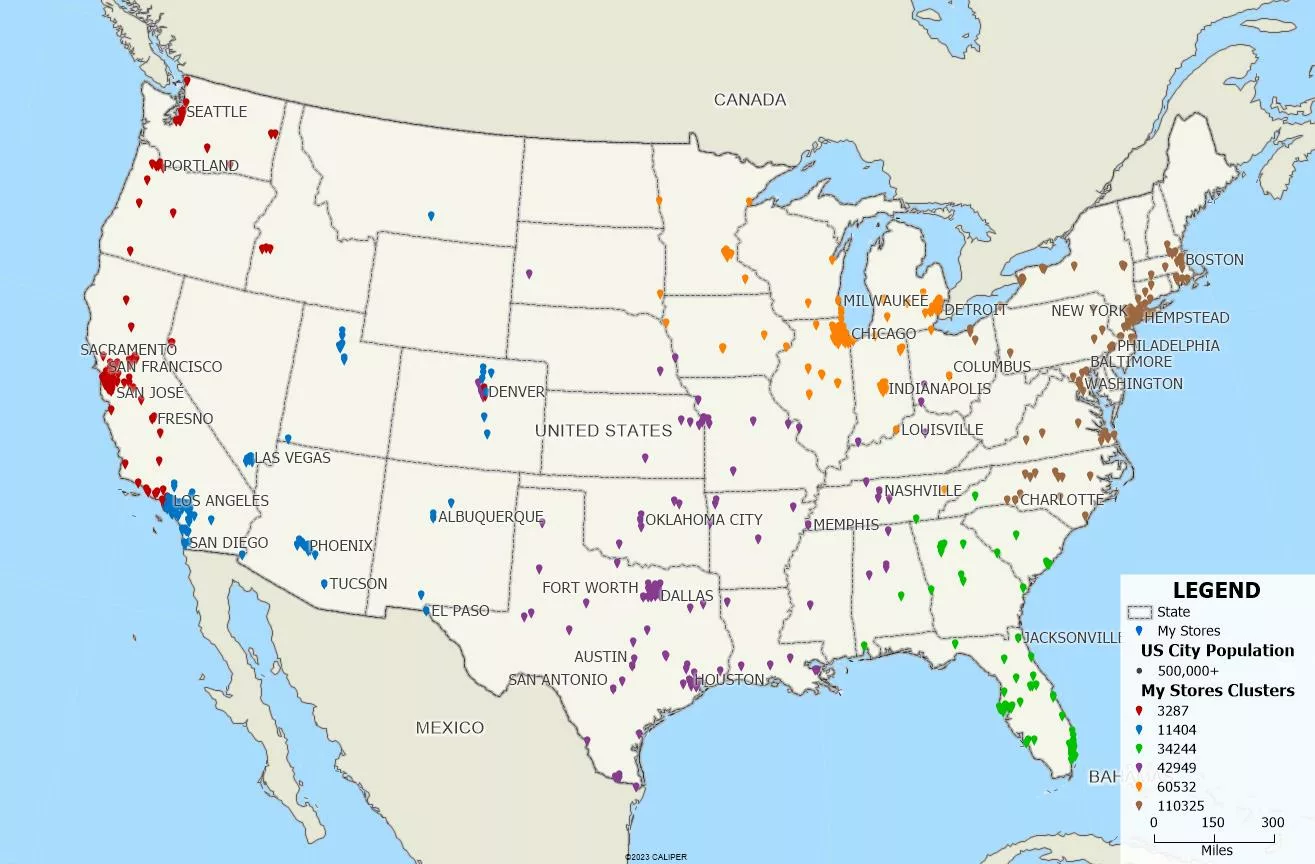
Cluster your stores with the Clustering Add-in
- Download a free mapping software trial of Maptitude Desktop or use your existing Maptitude Desktop license.
- Download and install the Maptitude Clustering Add-in.
- In a map with your store locations, go to Tools>GIS Developer’s Kit>Add-Ins>Clustering to start the Clustering Wizard.
- Select your store locations layer in the Layer dropdown and click Next.
- Select the method that Maptitude uses to group points that are close together.
For example, if you have a limitation where all your stores in a group must be no more than 30 minutes apart, you can select the Route option, select Fastest from the drop down, and specify to Skip routes longer than 30 minutes. - After specifying the clustering method, click Next.
- Enter the number of clusters that you wish to create.
- Choose one of the Cluster Balancing options.
For example, to balance each territories according to the number of stores in each territory, choose the Number of Points option. - Optionally, you can choose to Restrict the Capacity of each cluster and Compute Statistics for each cluster.
- Click Finish. Maptitude will create clusters of your stores according to the specifications.
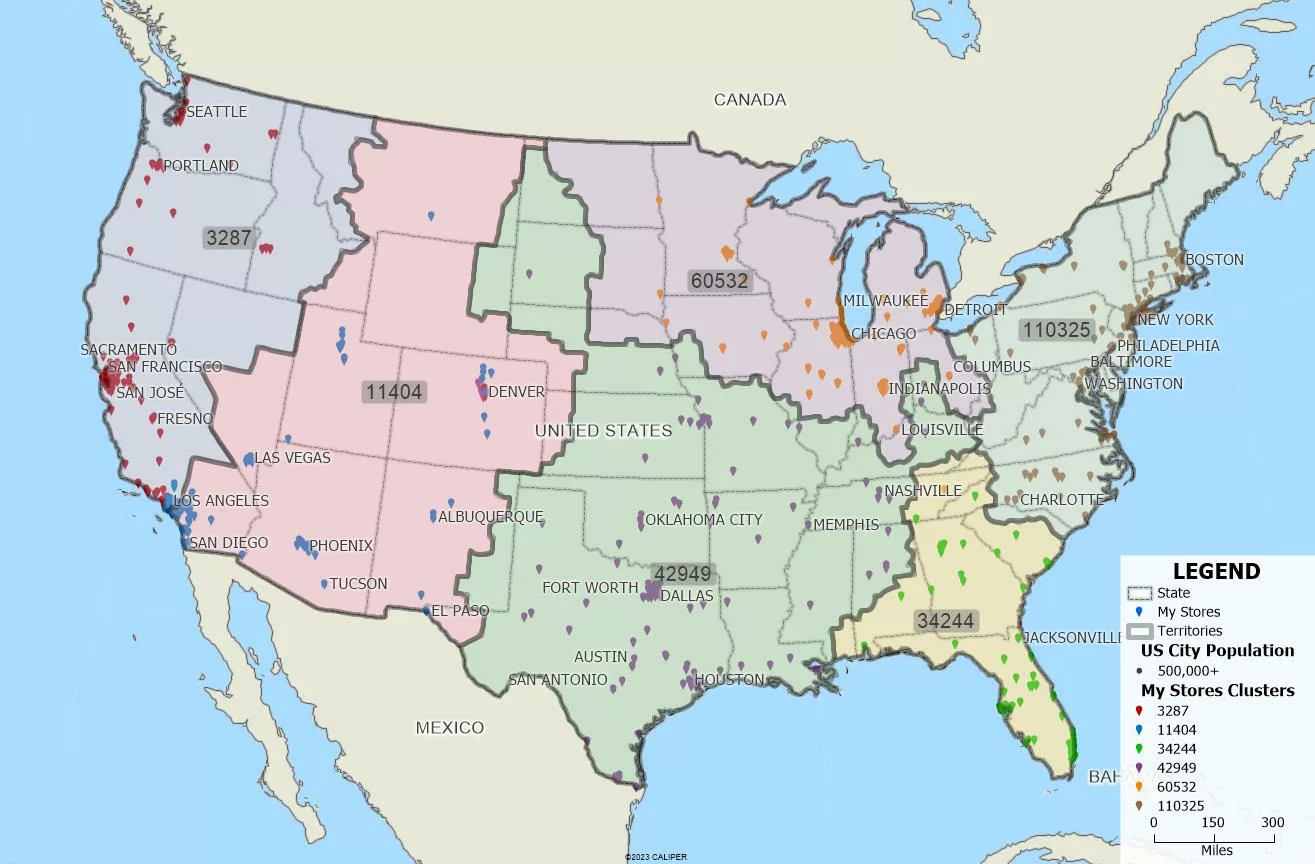
Create territories with the Clustering Add-in results
- Go to Map>New Territory Layer.
- Choose From my existing point layer and choose your stores layer. Click Next.
- Change the Geography Layer dropdown to the area you want your territories based on.
For example, if you have territories based on ZIP Codes, select 5-Digit ZIP Codes in this dropdown. Click Next. - Change the Layer Name Field dropdown to [cluster ID]. Click Next.
- Optionally, add Tracking Fields to track demographic information or your data at the territory level.
- Click Finish to create your territories.
Maptitude creates balanced territories for your store locations.
For other tools in Maptitude that can create balanced territories, please see Maptitude tutorial article on creating balanced territories.
For more information on creating territories in Maptitude, please see the Maptitude tutorial video on creating territories.
For information on making changes to territories in Maptitude, please see the Maptitude tutorial video on working with territories.